Product Use
User Operation Instructions
Main Menu
Click the "Firmware Version Area" in the lower left corner (as indicated by the arrow in Fig. 5-1) to switch to "Administrator Recognition", verify the administrator's face, and then enter the face machine management menu. Or click "Administrator Identification" to enter the interface of inputting the management password, enter the administrator password, and click "OK" to enter the face machine management menu (if no password or administrator is set, the system will not require authentication of the management password or administrator).
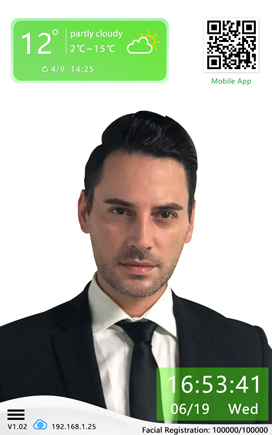
Main Interface
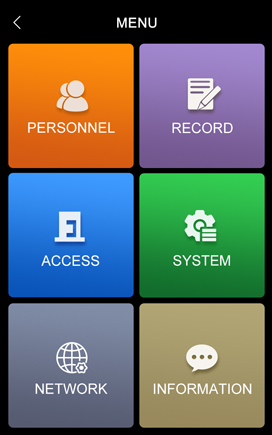
Menu Interface
Personnel Management
Click "Personnel Management" under the menu to enter the personnel management menu. Under this menu, you can add personnel, import from USB disk, backup to USB disk, browse and delete all personnel.

Personnel Management Interface
New personnel
Click "new person" to register a new person. Select the number, name and job, and the input keyboard interface will pop up. Enter the person information and click "return" to confirm. The personnel role can be ordinary personnel, administrator or blacklist.
Three types of new personnel can be selected as required: card number, password and face. After registration, click OK to complete the entry of new personnel.
The registration card number can be directly entered by pressing the key or registered by swiping the card;
Registration password, 1-8 digits in length;
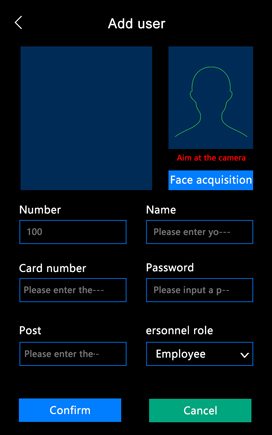
New User Interface
Keyboard Interface
Register a face, click the "face collection" button, and pay attention to the camera when collecting face photos. In order to ensure the input quality and contrast accuracy of face parameters, keep the natural expression during the input process. Please do not wear hats, glasses and other accessories that affect the collection of face features, do not let bangs cover the facial features, and do not wear heavy makeup.
After the device collects the face photos, it will prompt that the input is successful and the face collection is completed.
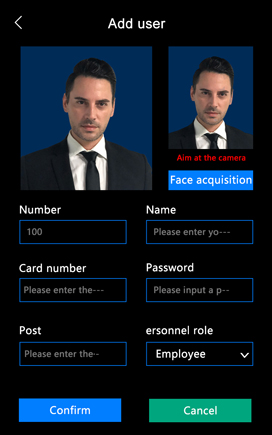
Face Acquisition Interface
Import from USB stick
Click "import from USB disk" to import the personnel information saved in the USB disk into the face machine.
Backup to USB disk
Click "backup to USB disk" to backup the registered personnel information to USB disk for saving.
Personnel browsing
Click "personnel browse" to query and browse the registered personnel. By default, they are arranged according to the number size. You can click "previous" and "next" to turn the page for query and display; You can also query by entering the number or name.

User Browsing Interface
Query the person to be modified, and click Modify to modify the details of this user. You can also click "delete" to delete the user directly. Personnel can be set as administrators through personnel role modification.
Delete all people
Click "delete all personnel" to delete all personnel information saved in the equipment.
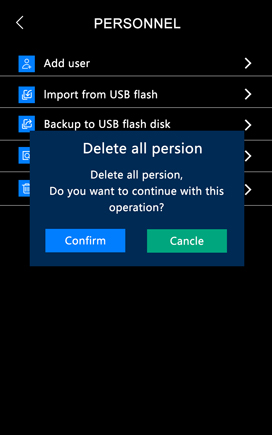
Delete all personnel interface
Records Management
Click "Record Management" under the menu to enter the record management menu. Under this menu, you can set the record storage, view the pass record, backup the record to the U disk and clear the record.
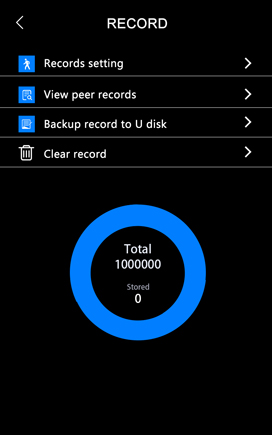
Record Management Interface
Record storage settings
Click "record storage settings" to set whether to save the stranger records and face pictures recognized by the device.
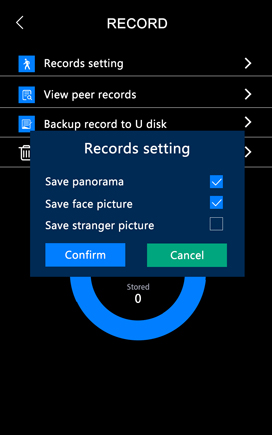
Record storage setting interface
View traffic records
Click "view passage record" to view the passage record of personnel during the working hours of the equipment. Click the small picture to view the large picture of the captured face.
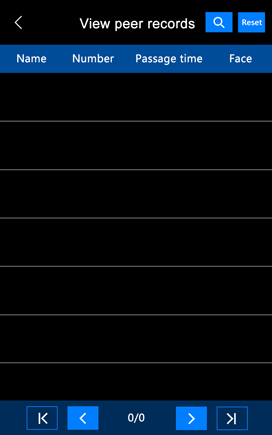
View traffic record interface
Click search, enter the personnel number, and click "+" - "on the top and bottom of the time box to enter the time period to be searched. You can query all the entry and exit records of the personnel with this number from the start time to the end time.
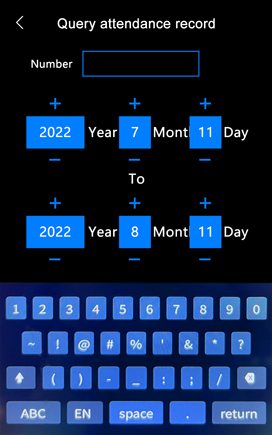
Find attendance record interface
Backup record to USB disk
Click "backup record to USB disk" to backup the personnel information recorded by the equipment to the USB disk for saving.
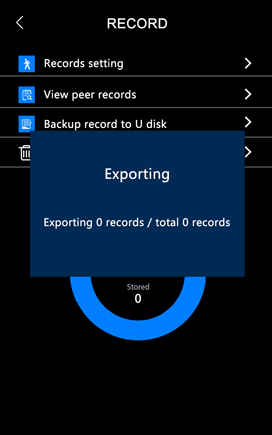
Backup record to USB disk interface
Clear records
Click "Clear Records" to delete all records saved in the device.
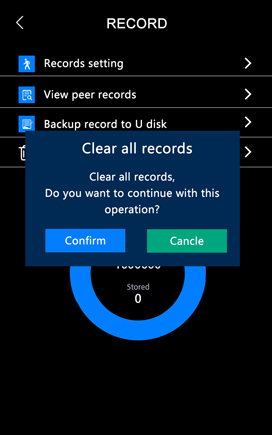
Clear the record interface
Access control settings
Click "access control settings" under the menu to enter the access control settings menu. It can modify the entry type, Wigand output format, door opening holding time, door magnetic setting, face recognition, verification interval and interval record storage settings.

Access Control Setting Interface
Access type
Click "entry / exit type" to set the entry / exit type of the machine: optional entry or exit.
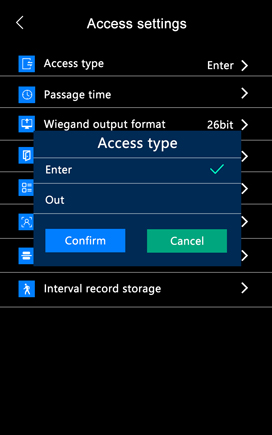
Access type interface
Wigand output format
Click "Wigand output format" to modify it to Wigand 2 6 (two bytes, three bytes) or Wigand 34 (four bytes).
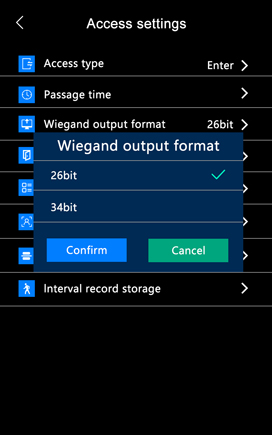
Wigand output format interface
Opening hold time
Click "door opening holding time" to set the door opening holding time from 0 to 65535. (0 stands for 0.5 seconds, 65535 stands for always on after verification)
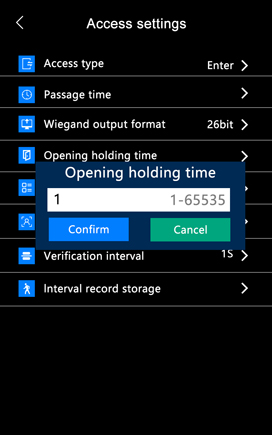
Door opening holding time interface
Door magnet setting
Click "Door magnetic setting" to modify the door magnetic type, door opening timeout, timeout alarm and door magnetic alarm.
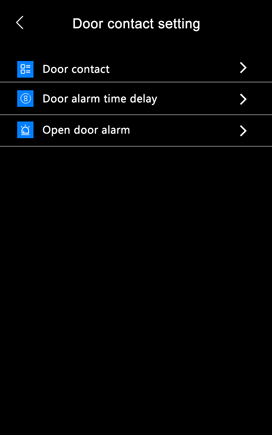
Door magnet setting interface
The door opening timeout can be set;
Timeout alarm and door magnetic alarm can be turned on or off.
Face recognition
Click "face recognition" to set the functions of the device such as authentication free, recognition threshold, living body detection, living body threshold, mask detection, mask threshold, body temperature detection, temperature compensation and alarm temperature.
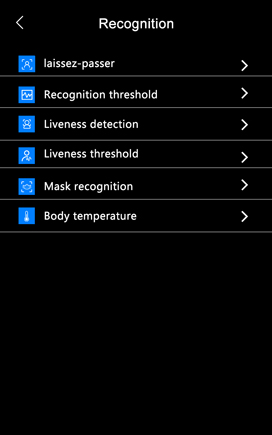
Face recognition interface
It can turn on or off the verification free function, living body detection, mask detection and body temperature detection;
The device identification threshold is 1 ~ 99, the living body threshold is 1 ~ 10, the mask threshold is 1 ~ 99, and the temperature compensation is - 1 ~ 1.
Verification interval:
Click "Verification interval" time to set 1 ~ 65535.
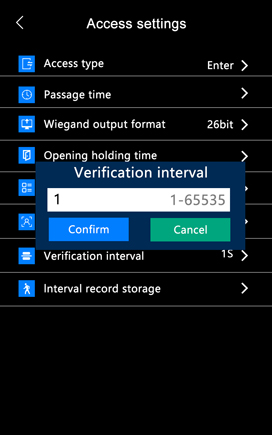
Verification interval interface
Interval record storage settings
Click "Interval record storage setting" to set off or on.
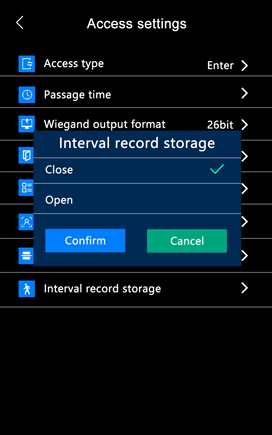
Interval record storage setting interface
System Settings
Click "System Setting" under the menu to enter the system setting menu. The menu includes main interface setting, clock setting, fill light setting, exposure setting, voice setting, brightness setting, language selection, menu password, infrared image and recognition distance.
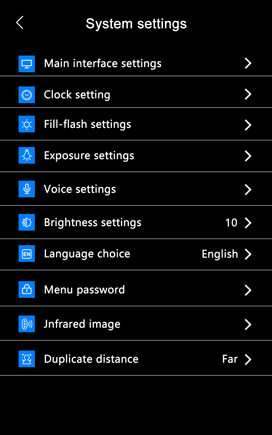
System Setting Interface
Main Interface Settings
You can set the company name, color and display effect of the face recognition box of the device, and turn on or off the display of IP address and registered number.
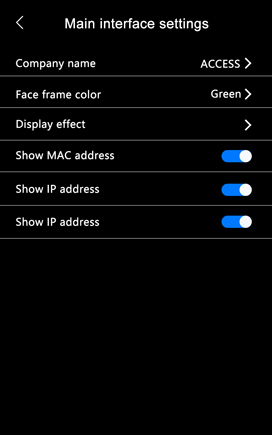
Main Interface Setting Interface
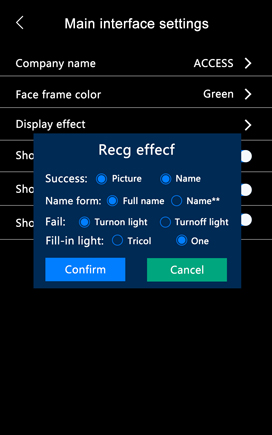
Display Effect Setting Interface
Clock Settings
Click "Clock Setting" to manually set the display time or automatically set the time through networking.
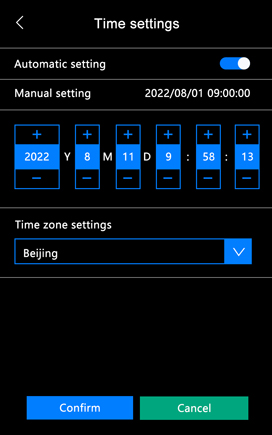
Time setting interface
Fill light settings
Click "fill light setting" to set normally open, normally closed or automatic fill light according to the site environment.
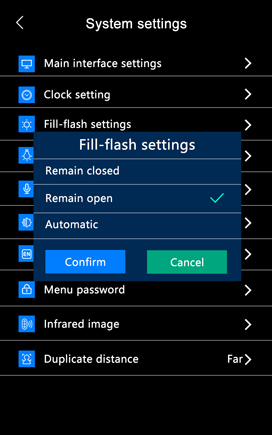
Fill light setting interface
Exposure Settings
Click "Exposure Setting" to set the exposure value between - 3 and 3.
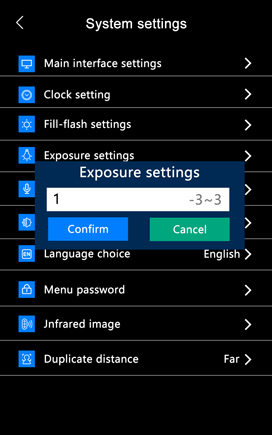
Exposure Setting Interface
Voice Settings
Click "Voice Settings" to set the broadcast volume, voice mode, greeting and stranger voice of the device.
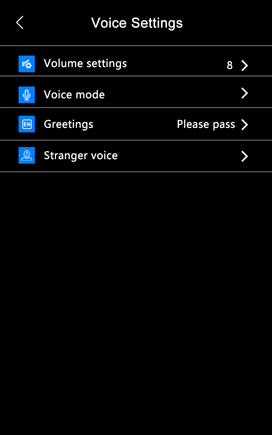
Voice Setting Interface
The maximum volume can be adjusted to 10;
Voice mode can broadcast names and greetings;
Greetings: please pass, welcome or time greetings;
Stranger voice can be set to select whether to broadcast when the device recognizes the prosthesis and the stranger.
Brightness Settings
Click "Brightness Setting" to set the display brightness of the device, up to 10.
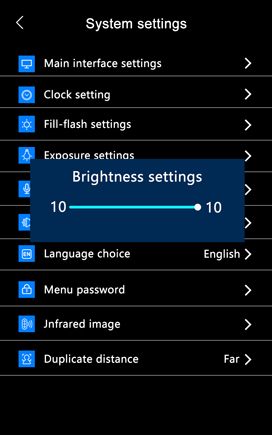
Brightness Setting Interface
Language Settings
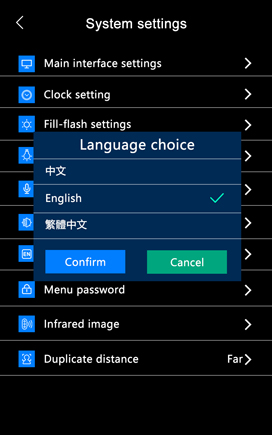
Click "Language Selection" to switch the language display of the device.
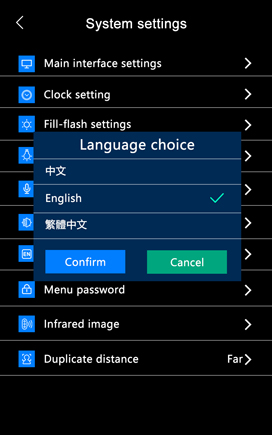
Language Selection Interface
Menu Password
Click "Menu Password" to modify the login password of the device.
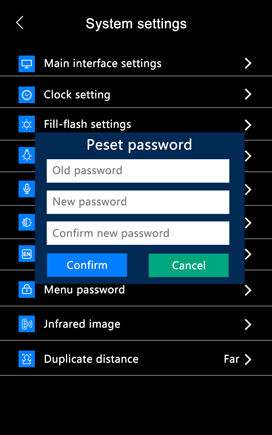
Login password modification interface
Infrared Image
Click "Infrared Image" to turn off or on the infrared image function of the device.
Infrared Image Interface
Identification Distance
Click "Identification Distance" to adjust the identification distance of the equipment (far, medium and near).
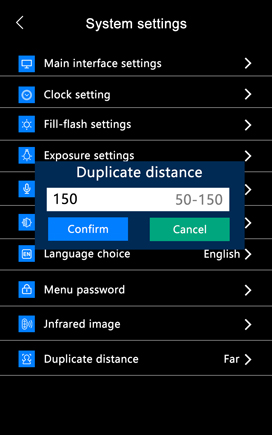
Identification Distance Interface
Network Settings
Click "Network Settings" under the menu to enter the network settings menu, which includes WiFi settings, network port settings, server settings and RTSP video stream settings, as shown in Figure 5-35.
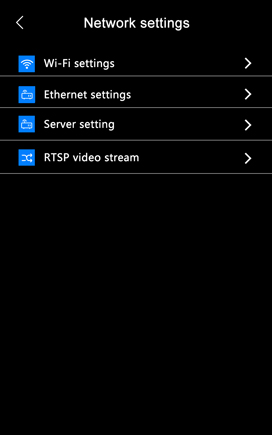
Network Setting Interface
WiFi Settings
Click "WiFi Settings" to open the WiFi networking function.

WiFi Setting Interface
Network Port Settings
Click "Network Interface Settings" to select whether to turn on or off the DHCP function (off by default). The TCP parameters of the machine can be modified. The default IP address is 192.168.1.150; The subnet mask is 255.255.255.000 by default; The default gateway is 192.168.1.1; The MAC address is fixed and unique.
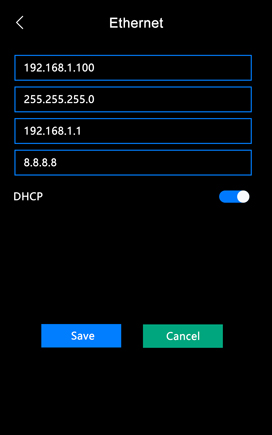
Network Interface Setting Interface
Server Setting
Click "Server Settings" to manually enter the server address, as shown in figure 5-38.

Server setting interface
RTSP video stream
Click "RTSP video stream" to turn this function on or off. The video stream resolution can be 720p, 480p or all, as shown in figure 5-39.

RTSP video stream setting interface
Information Service
Click "Information Query" under the menu to enter the information query menu. This menu includes information such as manufacturer, website address, serial number, factory date, system version, storage capacity, system upgrade, system maintenance and factory setting recovery, as shown in Figure 5-40.
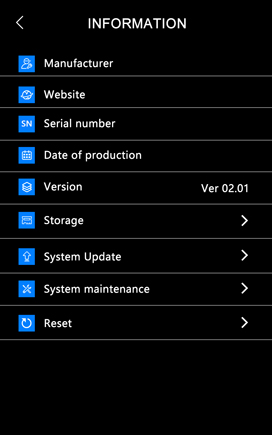
Information Query Interface
Storage Capacity
Click "storage capacity" this menu includes information such as management registration number, personnel registration number, face registration number, ID card registration number, password registration number, number of pass records and number of saved photos. The number on the left represents the number of existing information in the device, and the number on the right represents the maximum capacity of device registration information, as shown in figure 5-41.
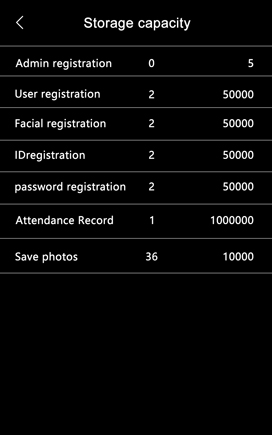
Storage Capacity Setting Interface
System Upgrade
Click "System Upgrade" to upgrade the equipment, as shown in figure 5-42.
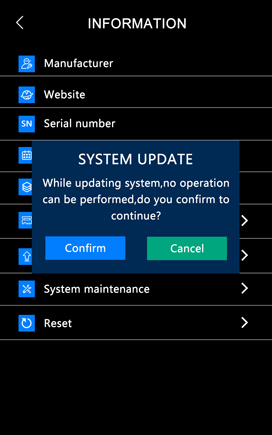
System Upgrade Interface
System Maintenance
Click "System Maintenance" to set the automatic restart time of the equipment, as shown in figure 5-43.
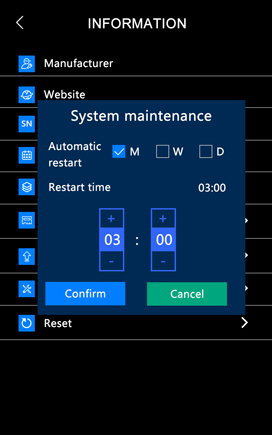
System Maintenance Interface
Restore Factory Settings
Click "Restore Factory Settings" to restore the equipment to factory settings, as shown in figure 5-44.
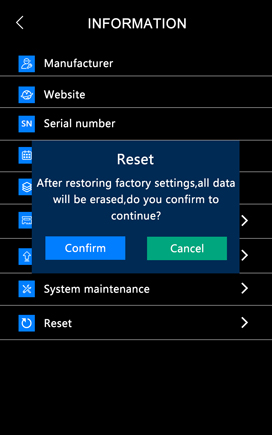
Restore factory setting interface