Temperature measurement interface management
Main interface management
Main interface Icon
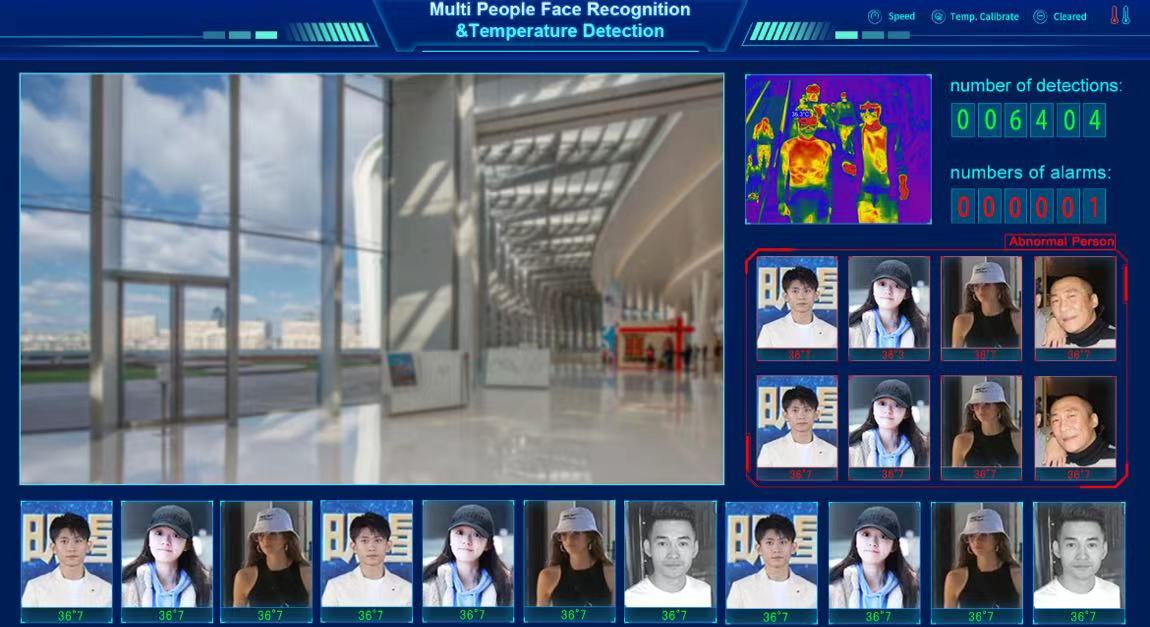
Main interface shortcut function settings
1. Click the [card] symbol on the upper left corner of the mouse for three times to enter the password: "888888".
2. The upper right corner [identification speed] has three modes: high, medium and low, which can be set according to the user's needs.
3. Click [clear] in the upper right corner to clear the detection times, alarm times and photos.
4. The thermometer symbol in the upper right corner is low temperature mode; The default is "allowed to broadcast standard temperature".
Common function parameter settings
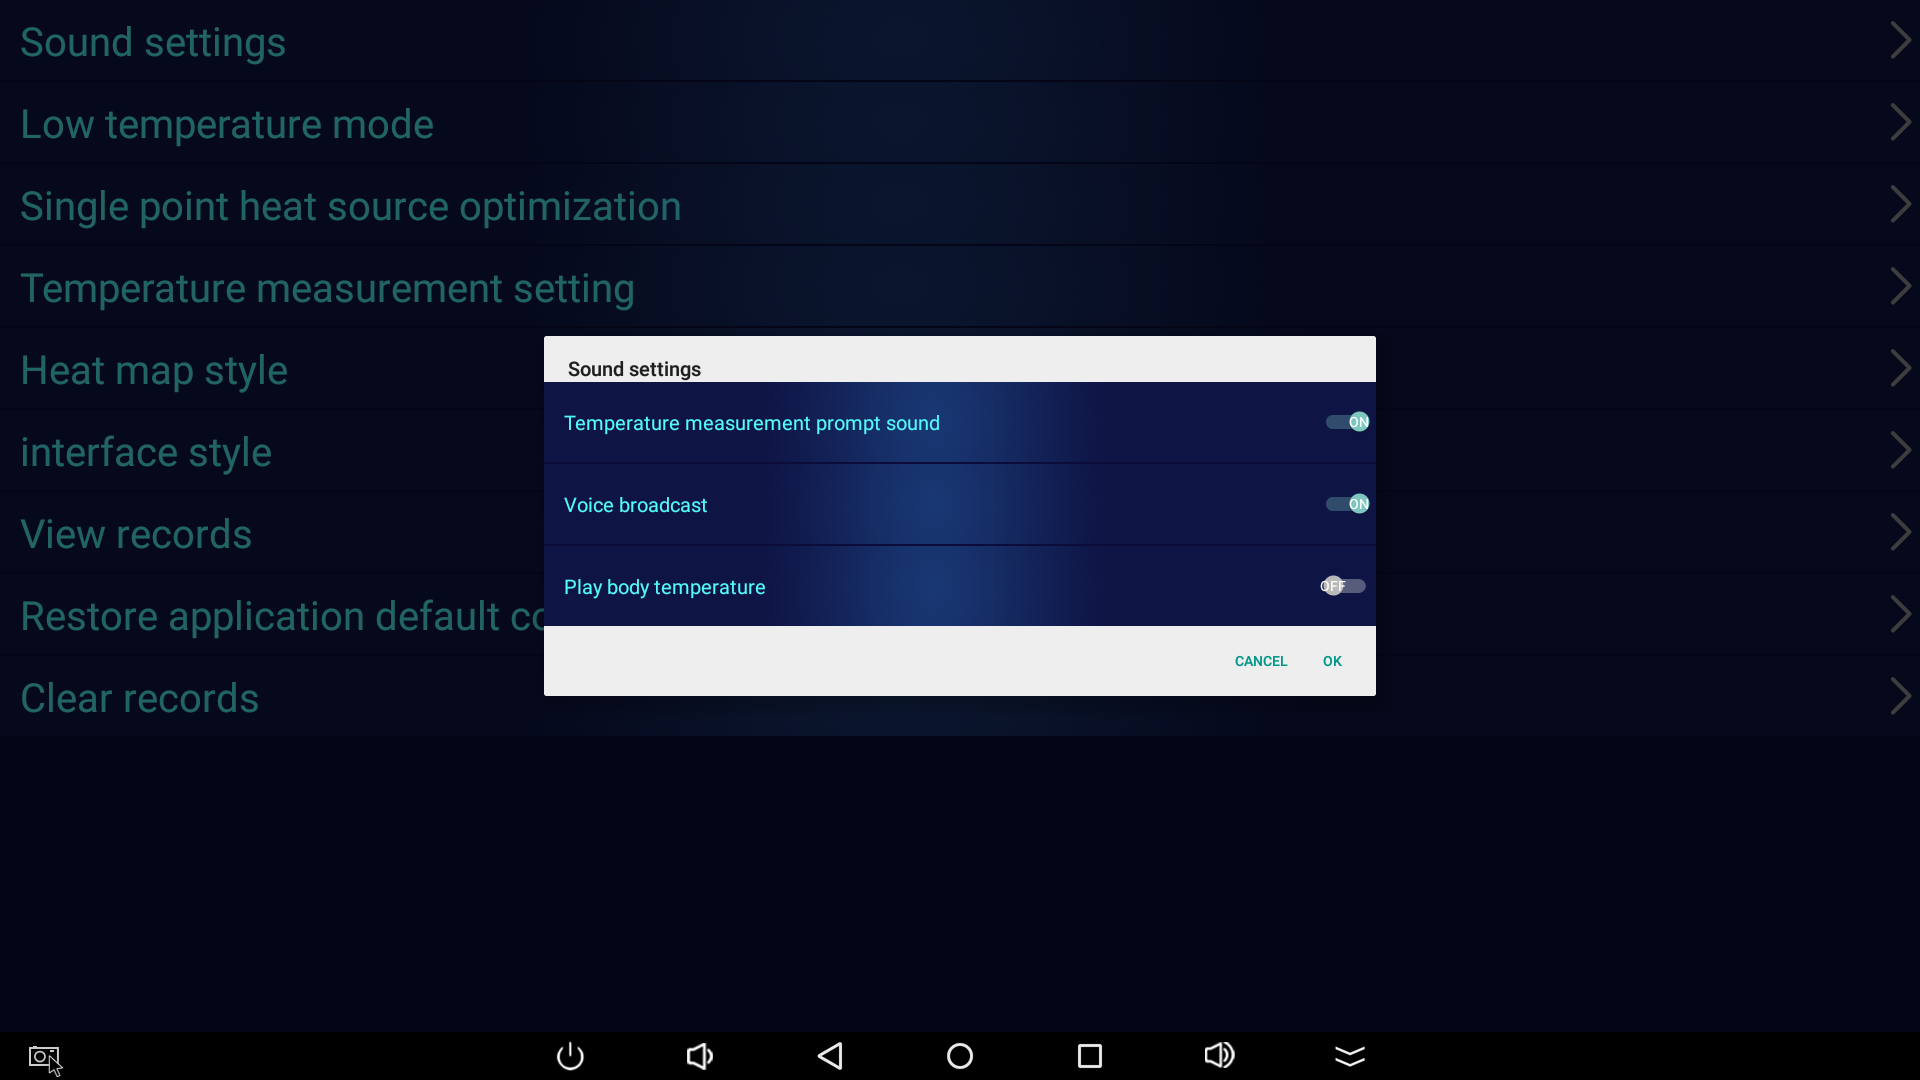
Sound settings
Operation steps:
● on the temperature measurement main page, click [card] at the upper left corner with the left mouse button for three times.
● enter the key 888888 to enter the menu bar.
● click "sound setting" with the left mouse button.
● select the sound item to be changed and click [OK].
Note: the temperature measurement prompt tone is "drop", which is enabled by default; Voice broadcast: "normal temperature"; Play body temperature: "body temperature is normal 36.5 ℃".
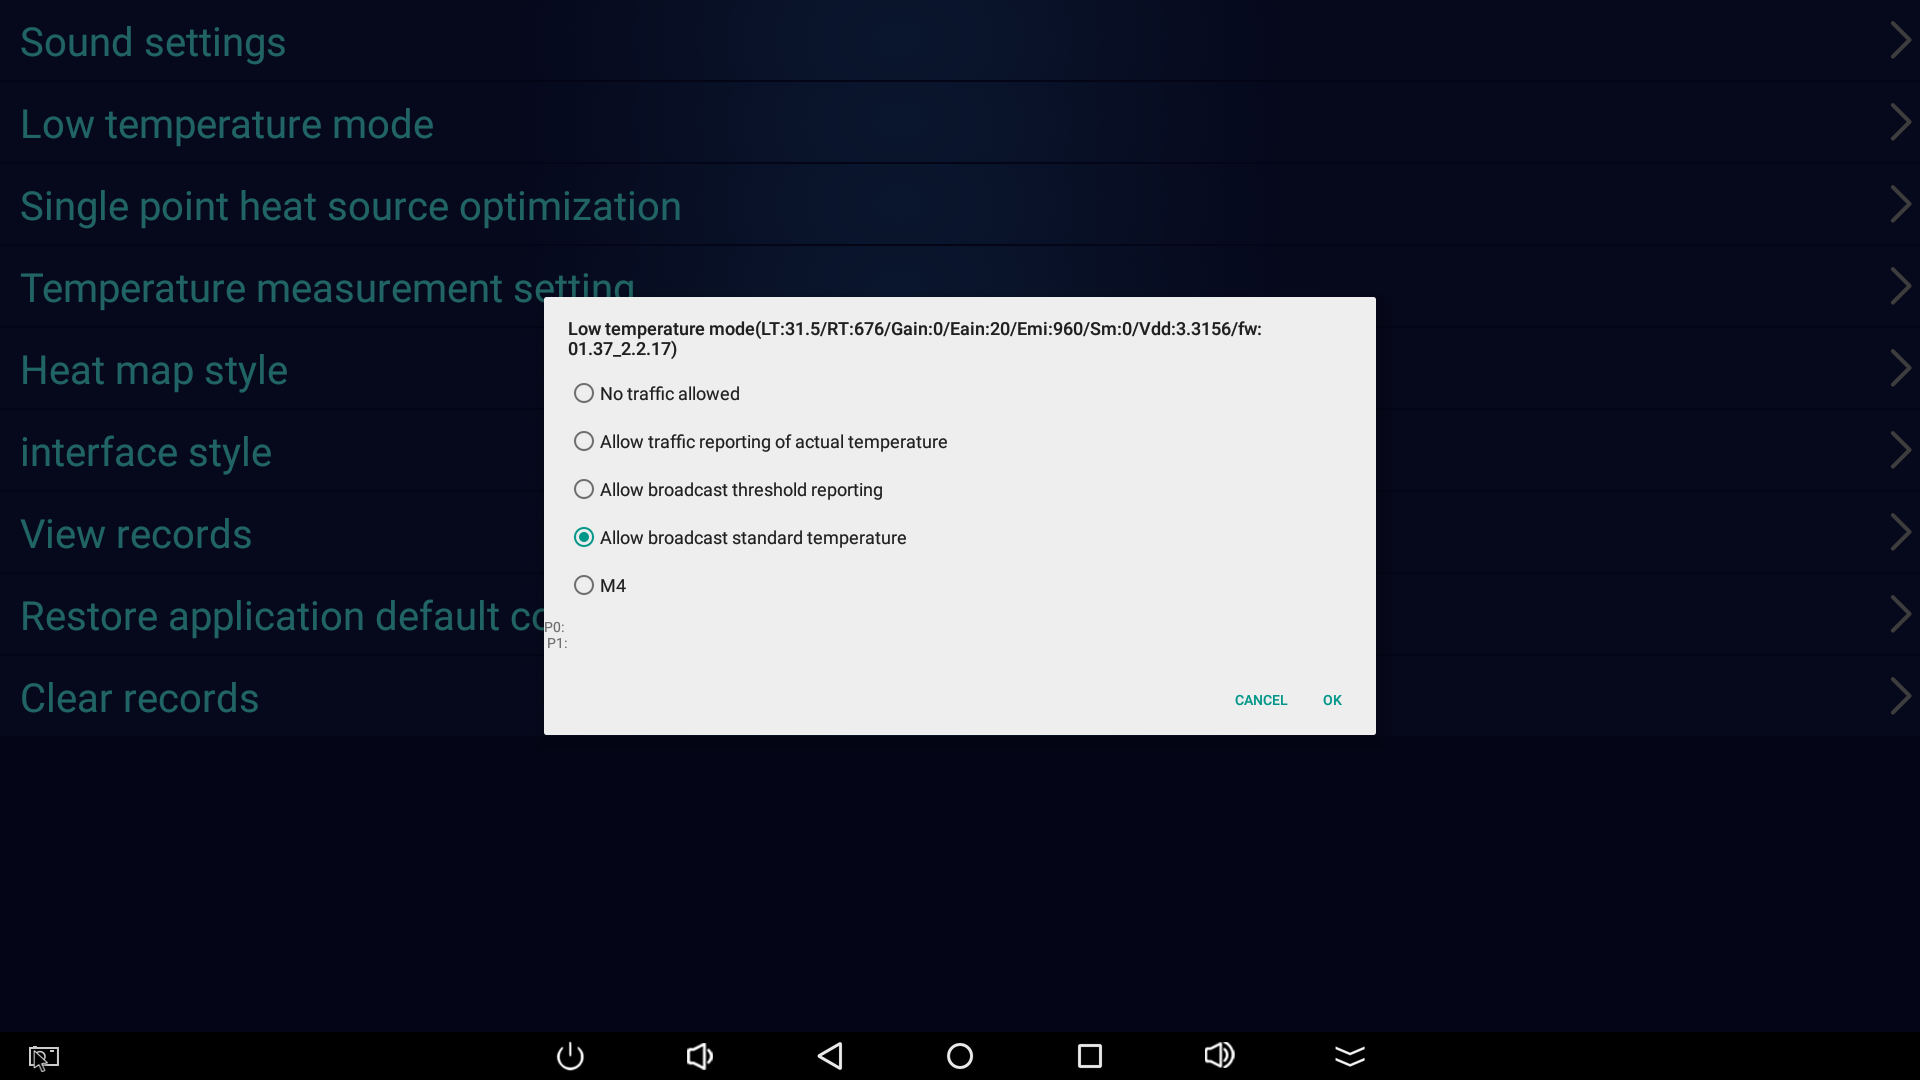
Low temperature mode
Operation steps:
● on the temperature measurement main page, click [card] at the upper left corner with the left mouse button for three times.
● enter the key 888888 to enter the menu bar.
● click "low temperature mode" with the left mouse button.
● select the mode item to be changed and click [OK].
Note: mode default: standard temperature mode (it is not recommended to change the mode); Outdoor environment: try to avoid the camera from being exposed to the sun. If the sun cannot be avoided, choose M4 mode.
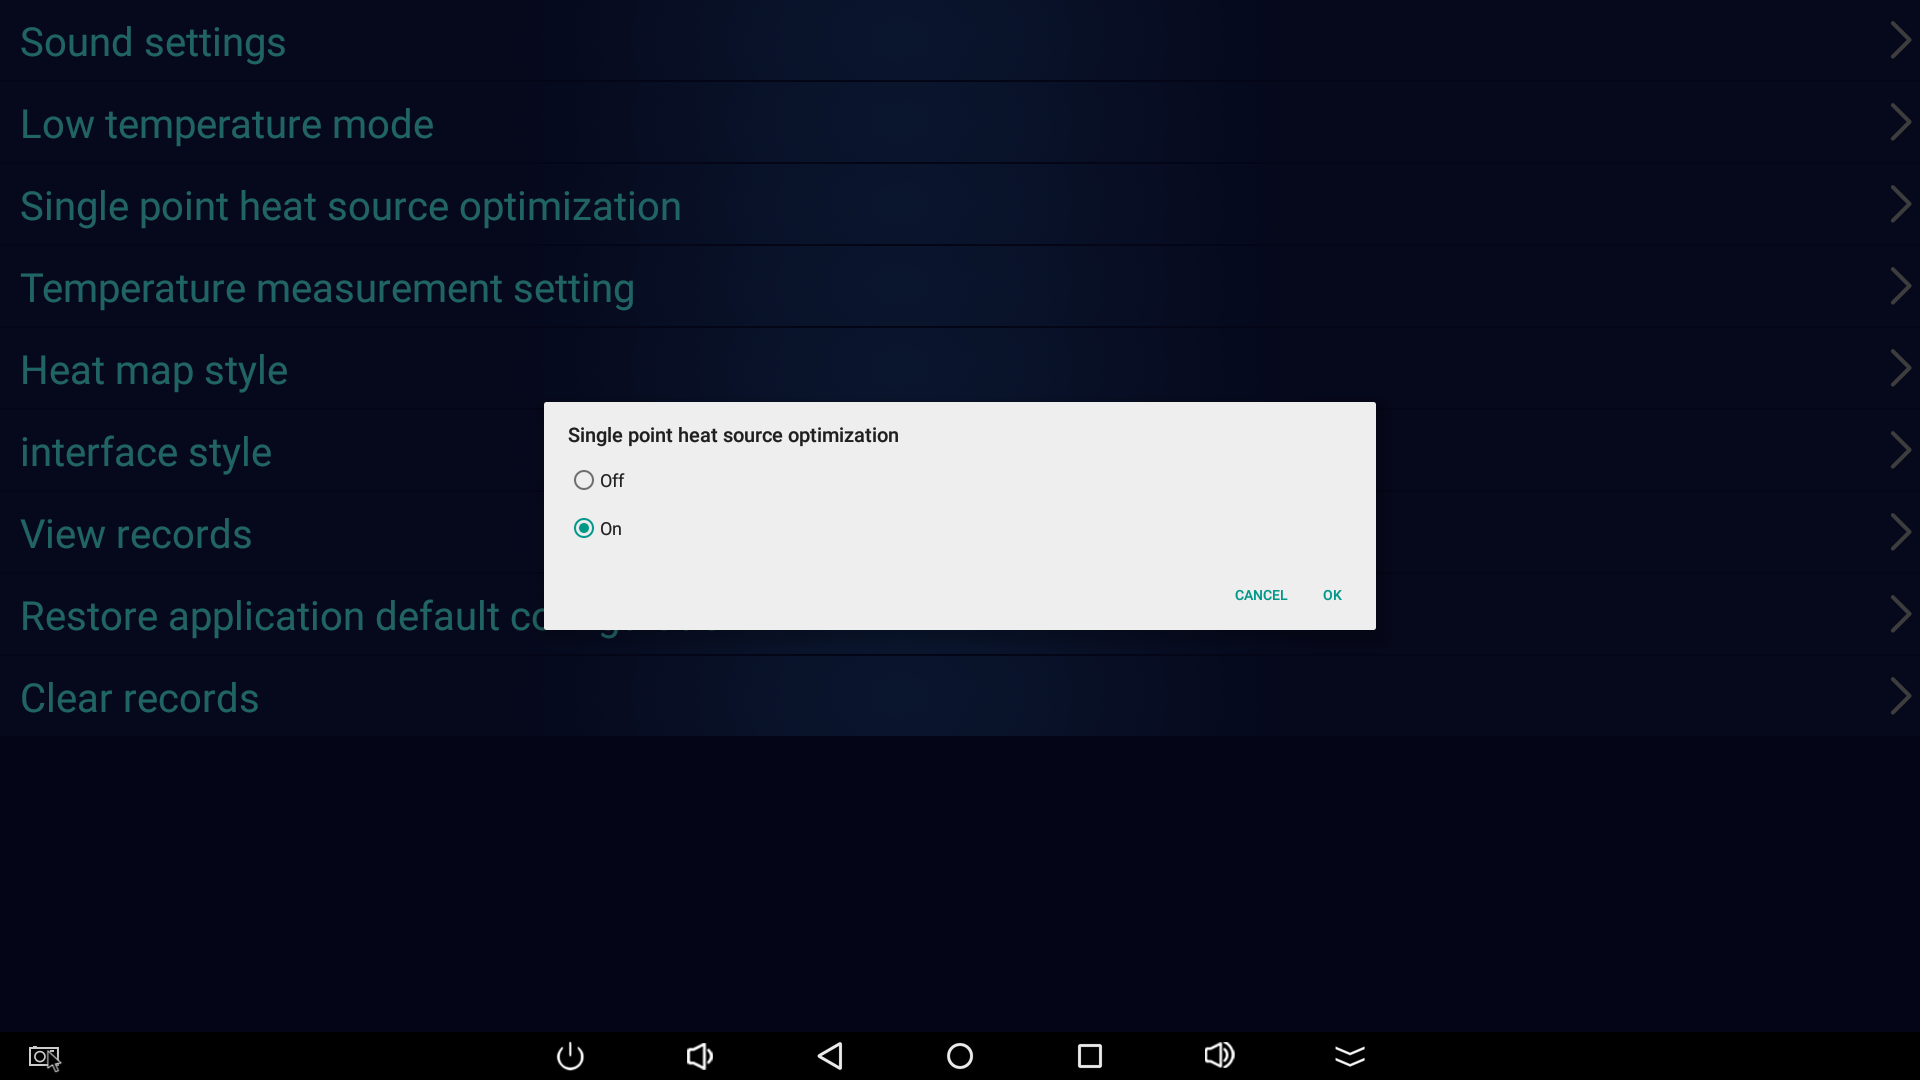
Single point heat source optimization
Operation steps:
● on the temperature measurement main page, click [card] at the upper left corner with the left mouse button for three times.
● enter the key 888888 to enter the menu bar.
● click "single point heat source optimization" with the left mouse button.
● select "Off" or "On" as required, and the default is "On".
Note: the function of single point heat source optimization is to make the temperature reach a stable state, and it is not recommended to close it.
Temperature measurement setting
Operation steps:
● on the temperature measurement main page, click [Card] at the upper left corner with the left mouse button for three times.
● enter the key 888888 to enter the menu bar.
● click "Temperature Measurement Setting" with the left mouse button.
● select the corresponding distance as required.
● click [OK] to save.
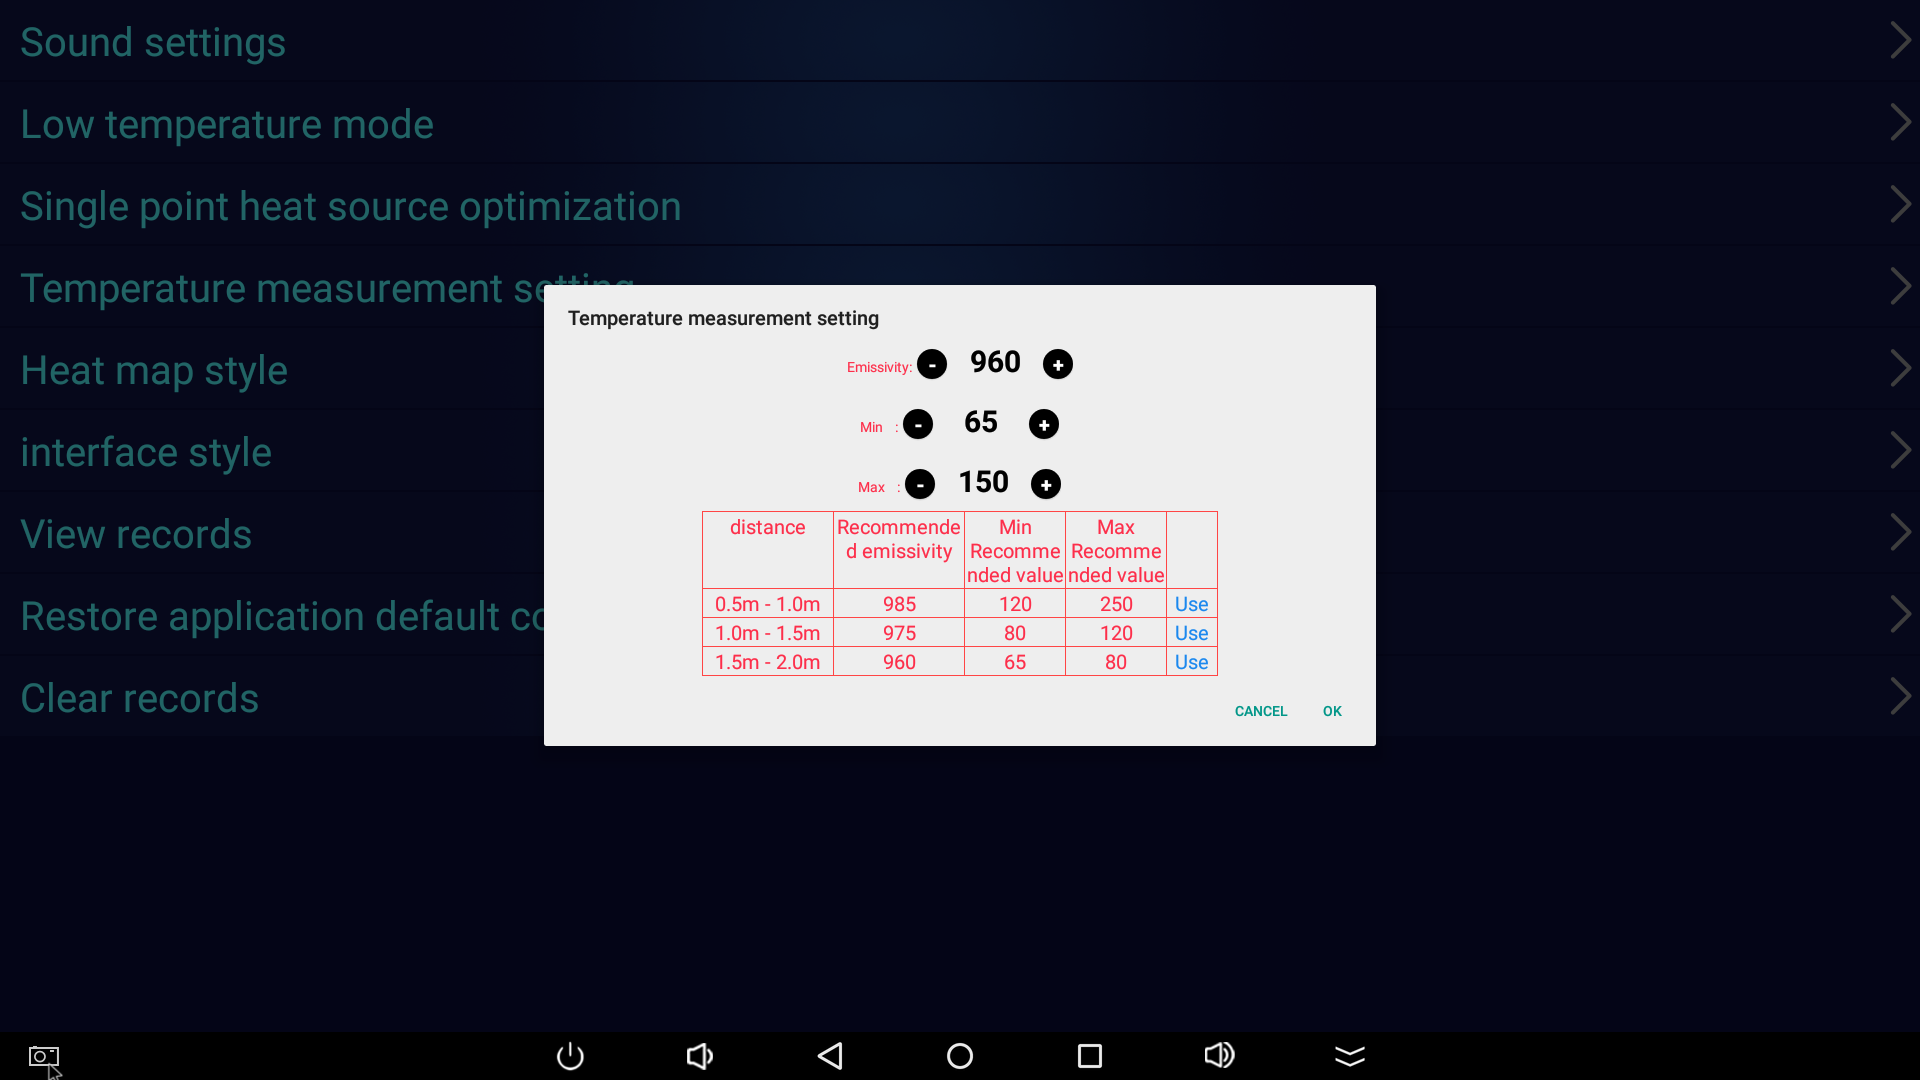
(1) The emissivity corresponds to the temperature measurement value. The higher the emissivity setting value, the lower the measured temperature. The lower the emissivity setting value, the higher the measured temperature. (emissivity does not need to be changed under blackbody constant temperature calibration)
(2) Min and Max adjust the minimum and maximum pixel points that can be measured. The middle range of the two values is the temperature measurement distance. If the temperature measurement distance needs to be adjusted further, the min value can be adjusted lower. (Note: adjusting the distance may affect the accuracy of temperature measurement)
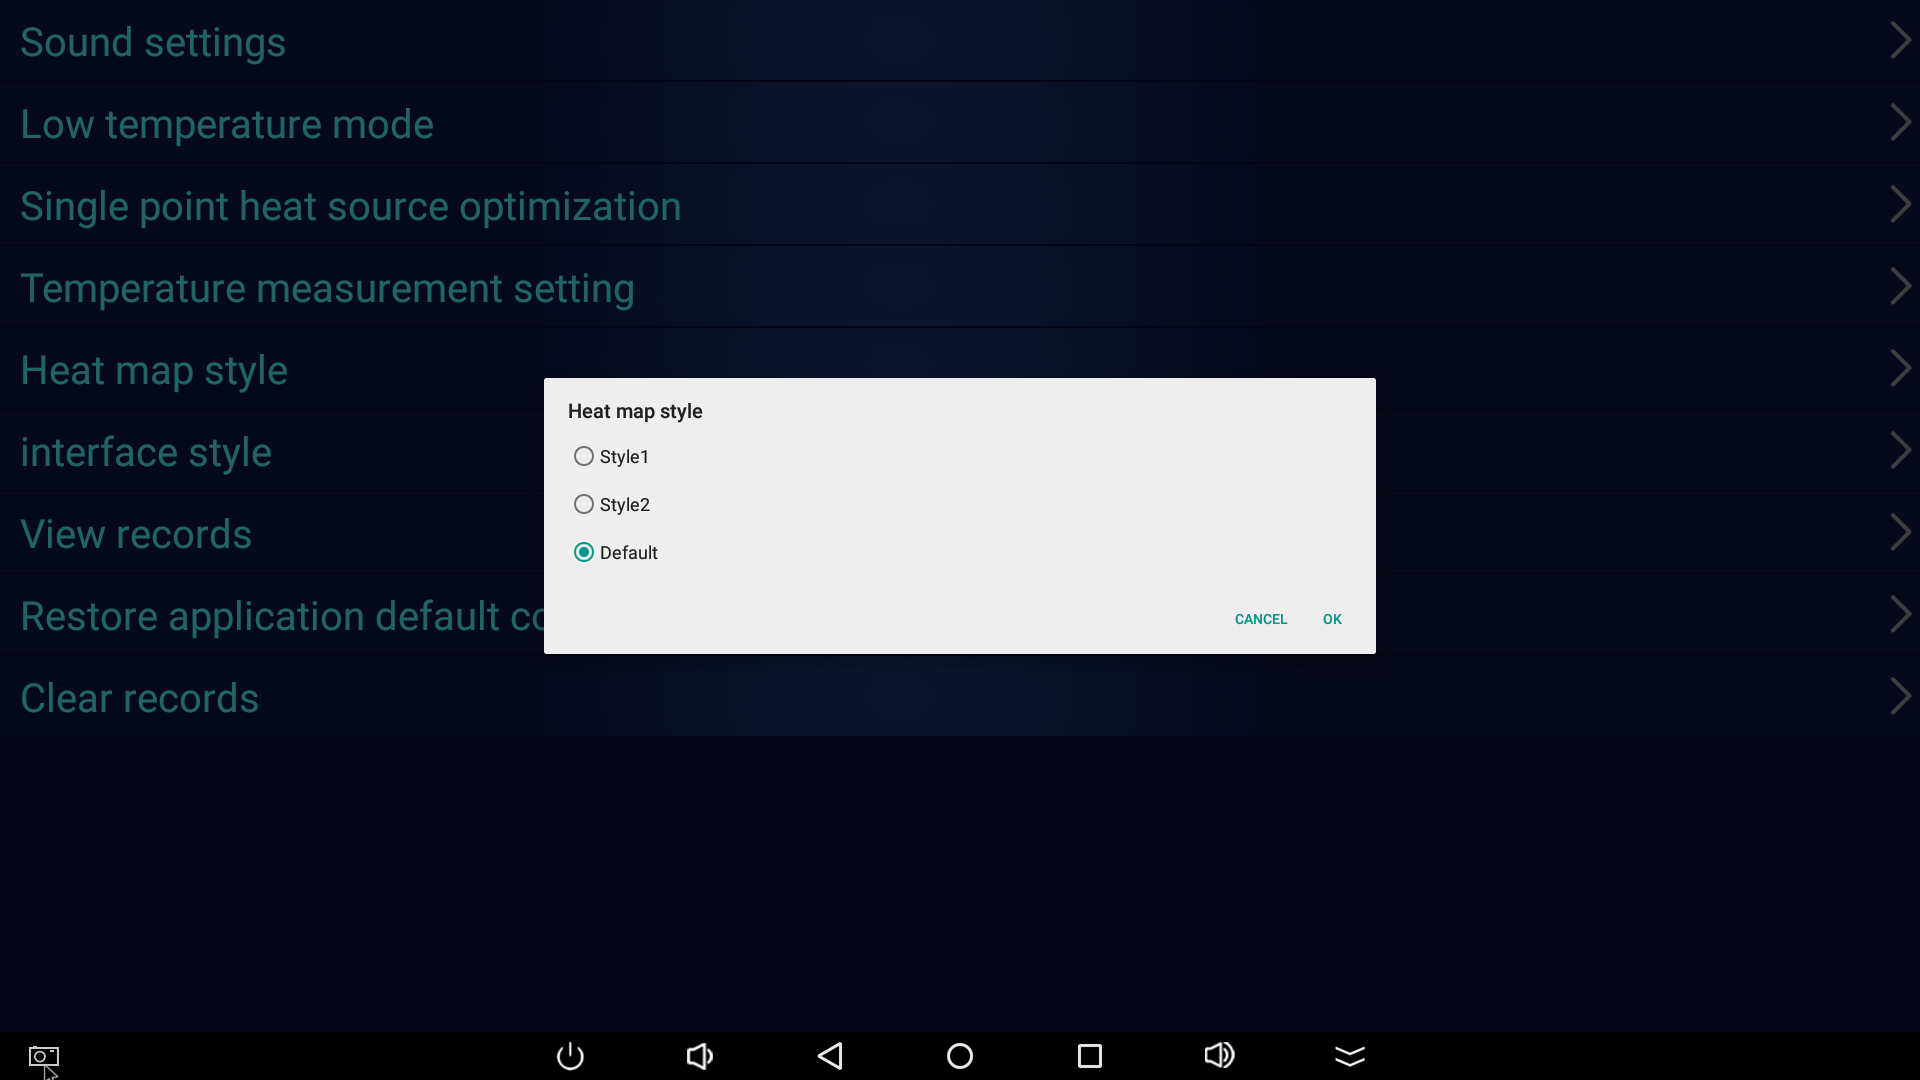
Thermal map style
Operation steps:
● on the temperature measurement main page, click [Card] at the upper left corner with the left mouse button for three times.
● enter the key 888888 to enter the menu bar.
● click "Thermal Map Style" with the left mouse button.
● select the corresponding color and click [OK] to wait for the equipment to restart.
Note: please refer to the interface diagram in the appendix before selecting the thermal imaging color. The default is default.
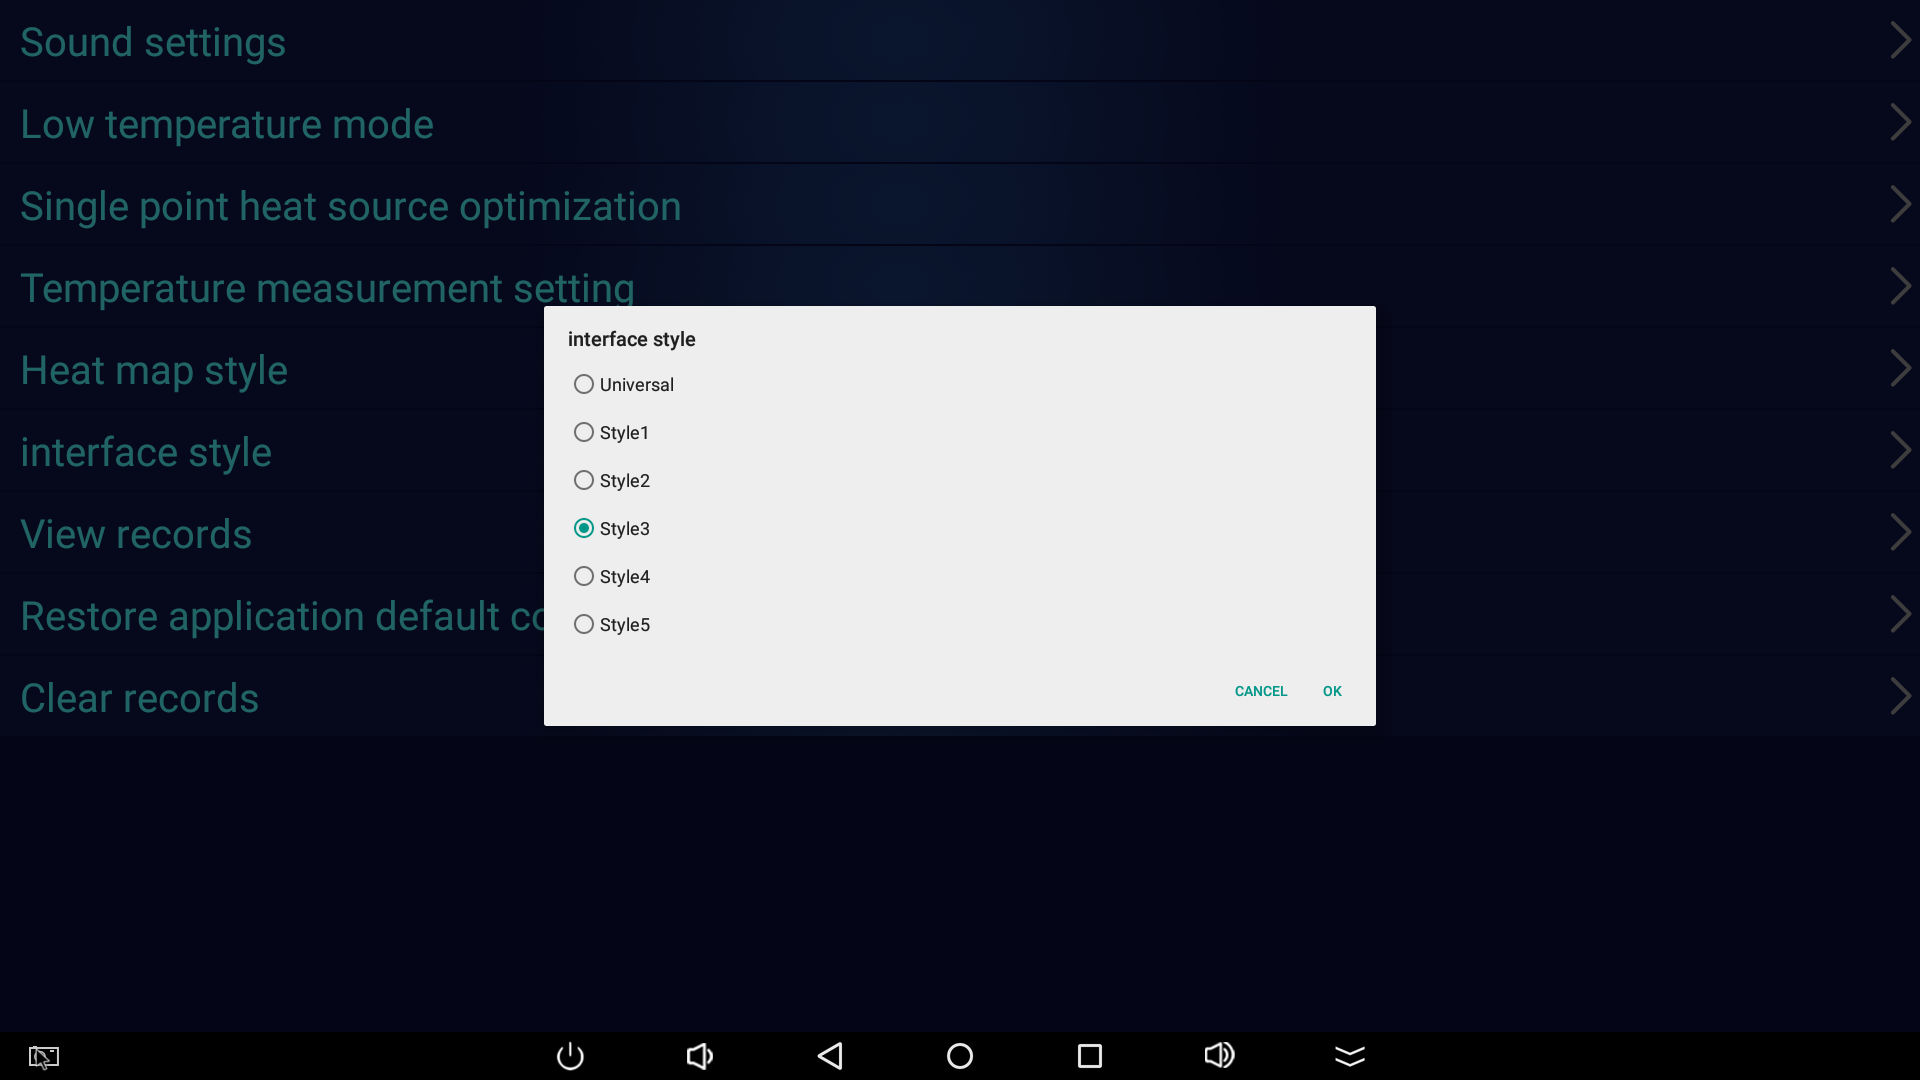
Interface style
Operation steps:
● on the temperature measurement main page, click [Card] at the upper left corner with the left mouse button for three times.
● enter the key 888888 to enter the menu bar.
● click "Interface Style" with the left mouse button.
● select the corresponding style and click [OK] to wait for the equipment to restart.
Note: please refer to the interface diagram in the appendix before selecting the interface style. The default is stay3 style.
View records
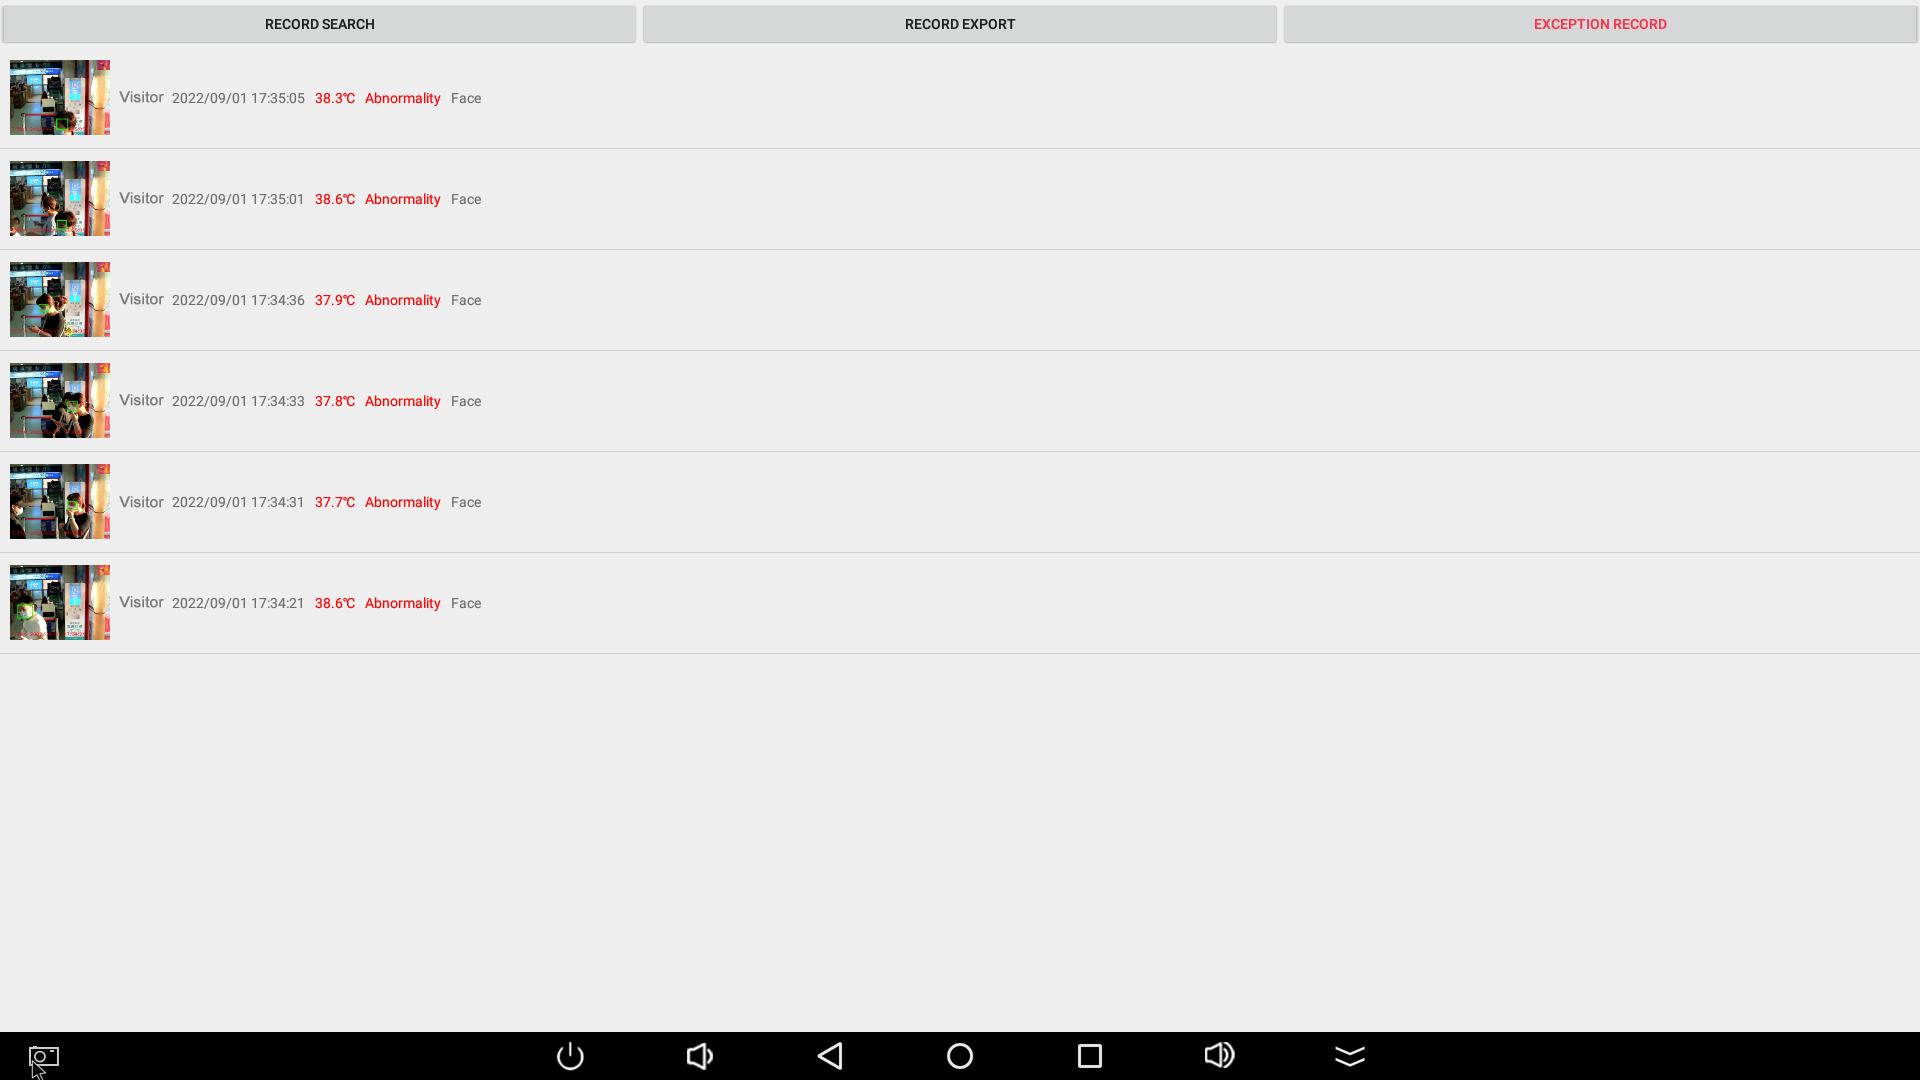
There are three ways to view records: record search, record export, and exception record.
Record search
Note: records and snap photos are saved for 7 days by default, and records and photos of the first day are deleted on the 8th day. If you need to change the number of days saved, please contact the administrator to change through background settings.
Operation steps:
● on the temperature measurement main page, click [card] at the upper left corner with the left mouse button for three times.
● enter the key 888888 to enter the menu bar.
● click [View record] with the left mouse button.
● click [record search] with the left mouse button, select the corresponding time and click [OK].
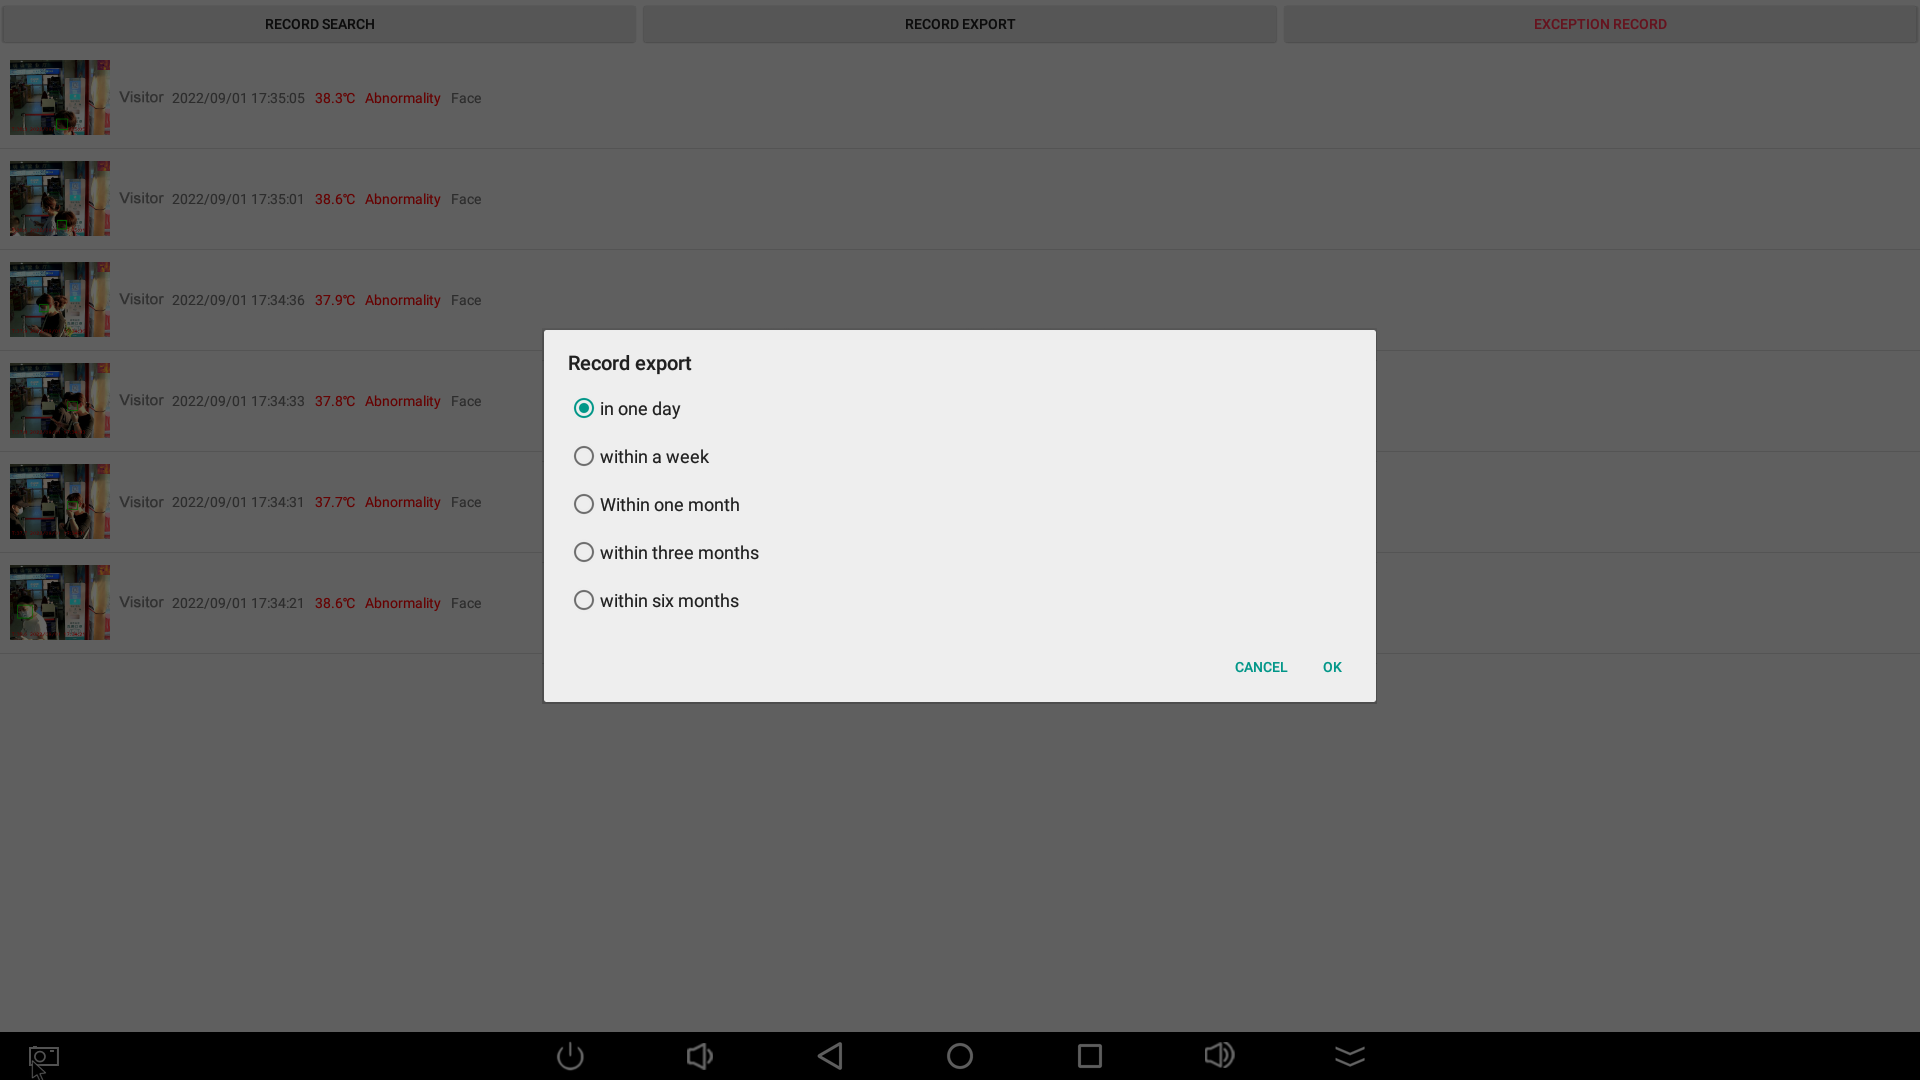
Record export
Operation steps:
● enter the setting menu.
● click [record export] with the left mouse button.
● select the corresponding time and click [OK].
Note: the exported records are in the "vcardrecord" folder of the local root directory of Android. You can insert a USB disk and copy it to the computer to view the records.
If the export quantity is too large, it will be divided into 500 records into one table until the data export is completed.
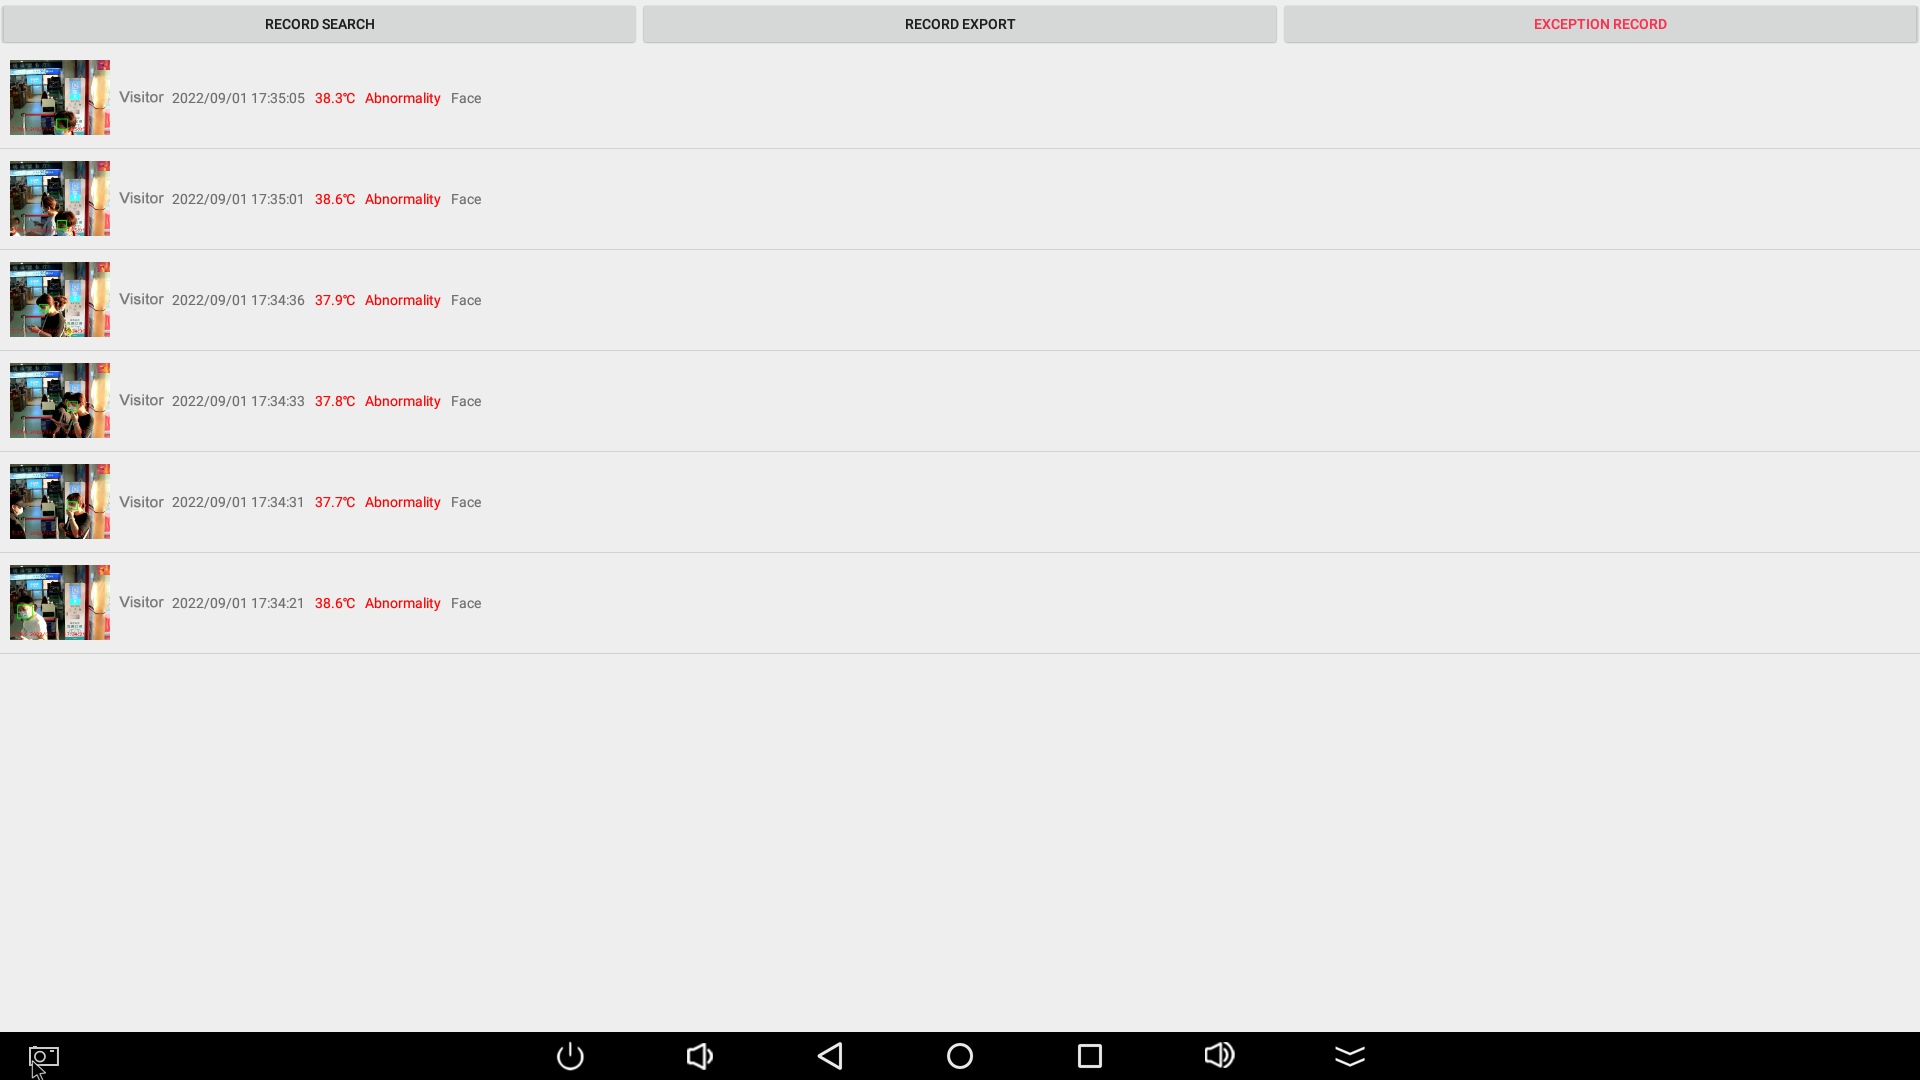
Abnormal record
Operation steps:
● enter the setting menu.
● click [abnormal record] with the left mouse button.
Note: this screening function is used to screen records whose body temperature is higher than or equal to the high temperature threshold value. The high temperature threshold value is 37.5 ° by default. If you need to change the threshold value, please contact the administrator to change it through background setting.
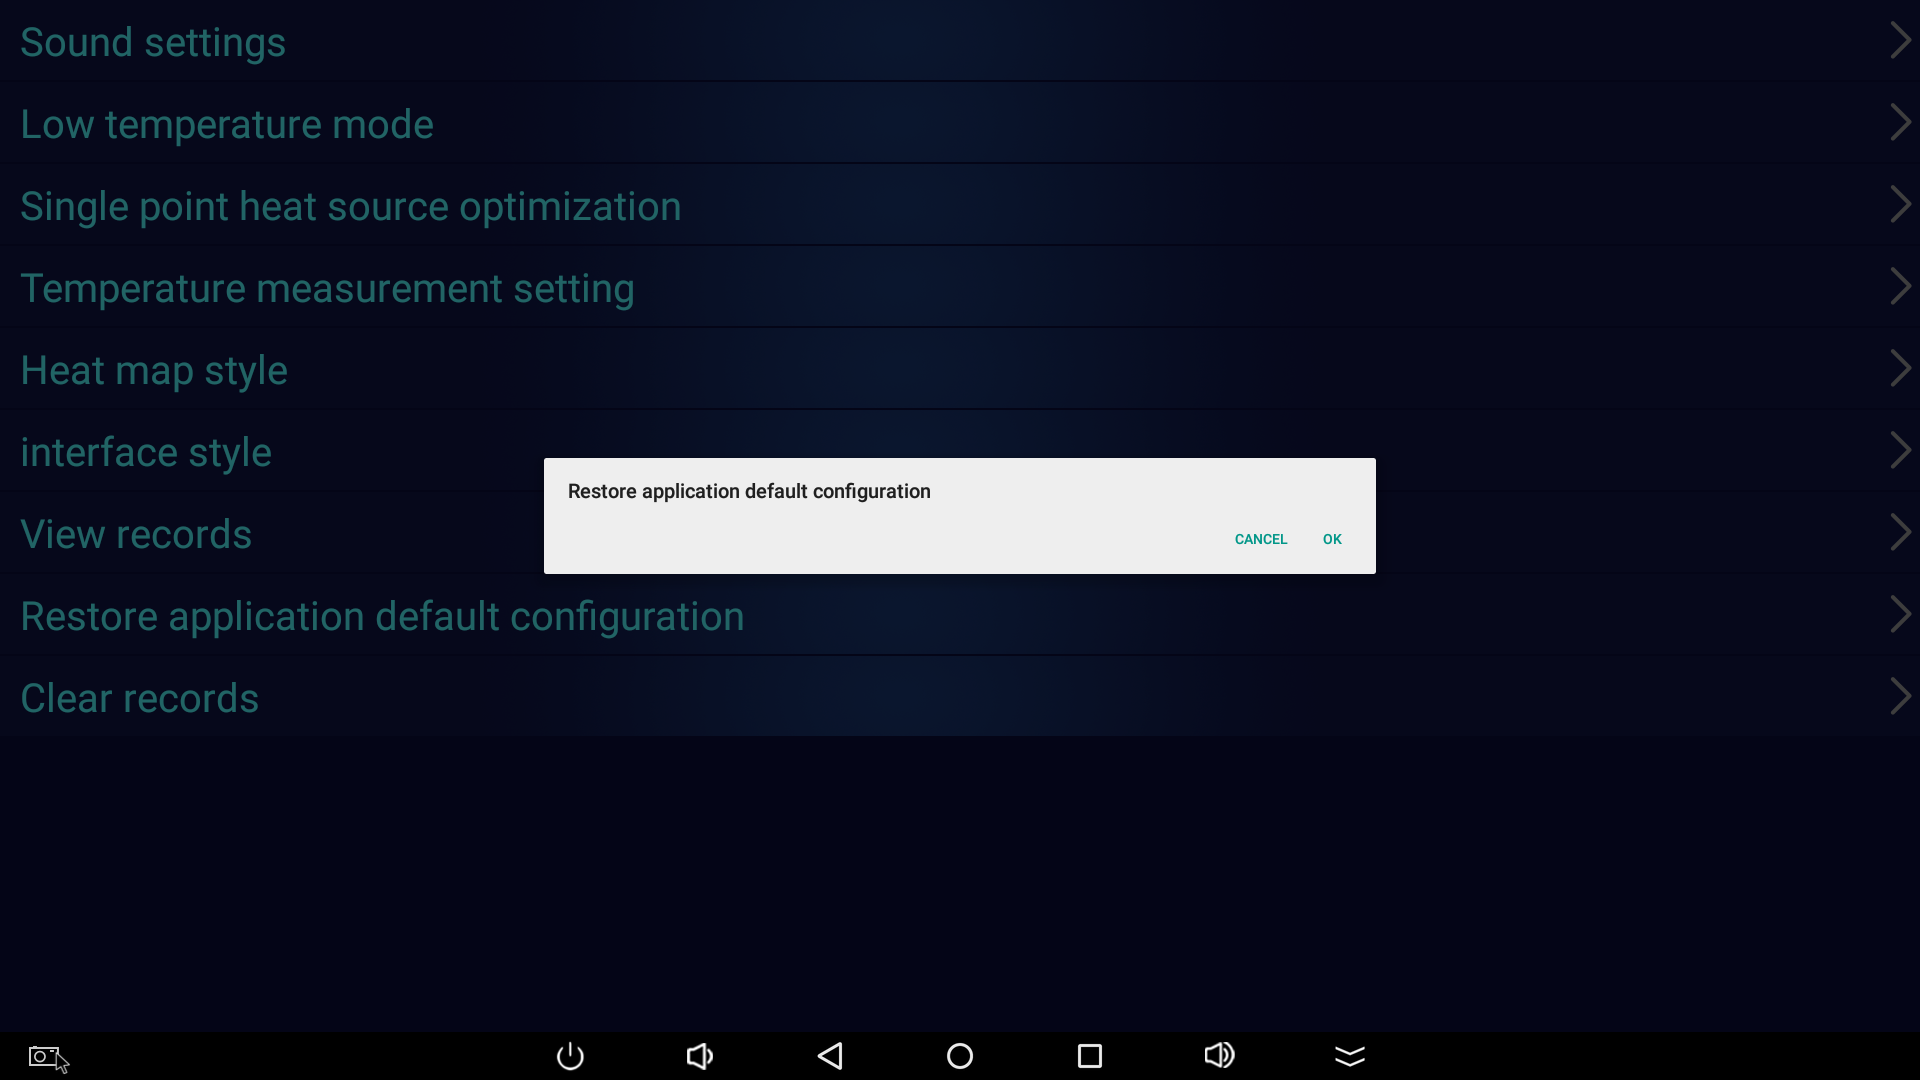
Restore application default configuration
Note: this step will clear the set parameters and restore the default parameters.
Operation steps:
● on the temperature measurement main page, click [card] at the upper left corner with the left mouse button for three times.
● enter the key 888888 to enter the menu bar.
Left click [restore application default settings] and wait for the device to restart.
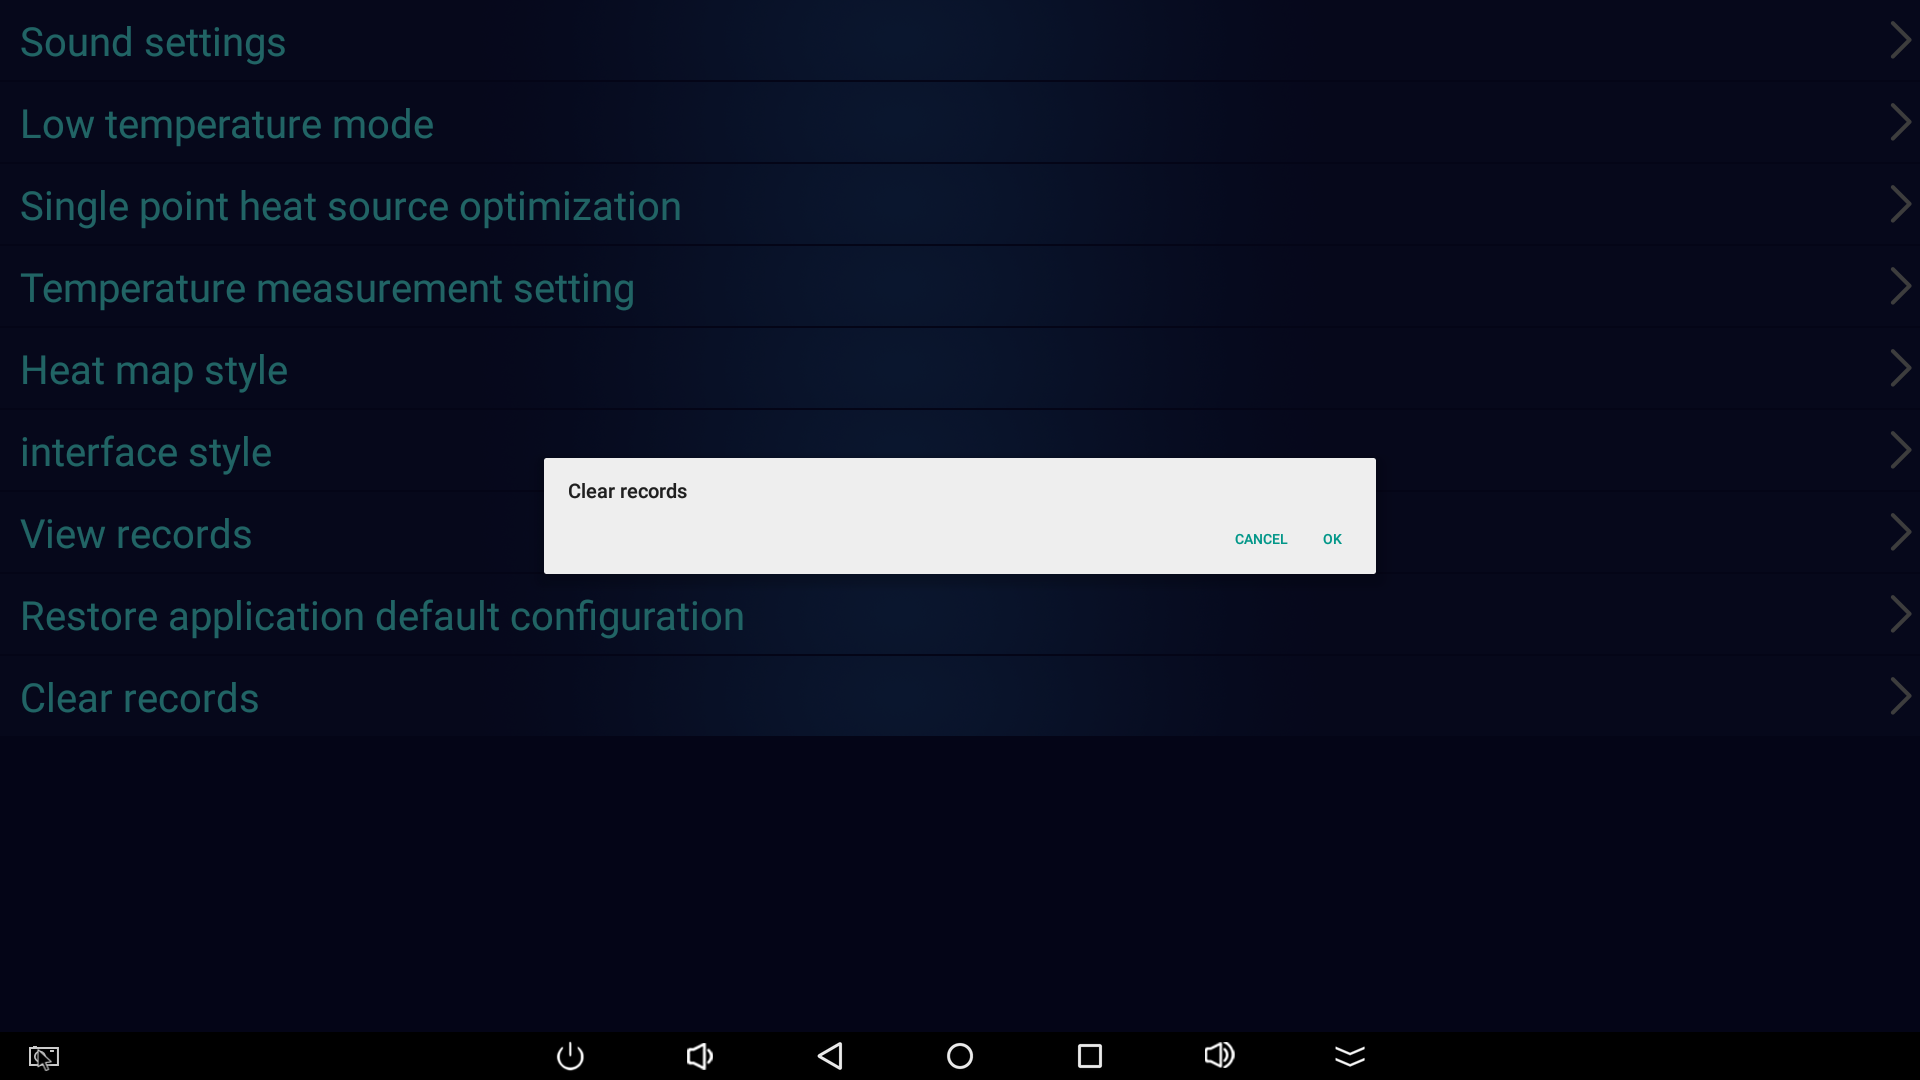
Clear records
Note: this step will clear all records and snapshots. Please be careful! Records and snap photos are saved for 7 days by default, and records and photos of the first day are deleted on the 8th day. If you need to change the number of days saved, please contact the administrator to change through background settings.
Operation steps:
● on the temperature measurement main page, click [card] at the upper left corner with the left mouse button for three times.
● enter the key 888888 to enter the menu bar.
● click [clear record] with the left mouse button and wait for the equipment to restart.
Note
1. This product is precision machinery, please handle it carefully. Falling or strong impact will cause equipment damage or failure.
2. Do not use abrasive, isopropanol or solvent to clean the housing and lens of the instrument. Use semi wet cloth or weak alkaline cleaning solution to clean the housing.
3. The heat engine must be turned on for 30 minutes every day when the machine is started for use, so that the equipment and the black body can be used normally after reaching the heat balance state.
4. Please do not use this product near heaters such as direct sunlight / closed space / heater for a long time.
5. Do not use this equipment to test the sunlight and laser, which may damage the infrared sensor and distance sensor.
6. Please do not use in the environment affected by strong alkali, organic solvent and corrosive gas.
7. Please do not set the product function when contacting food.
8. Please avoid changing the ambient temperature sharply. Due to the rapid temperature change, there will be water droplets attached inside the machine, which is the cause of the fault.