Fingerprint Acquisition System Client Instructions
Fingerprint sensor and fingerprint machine installation and setting
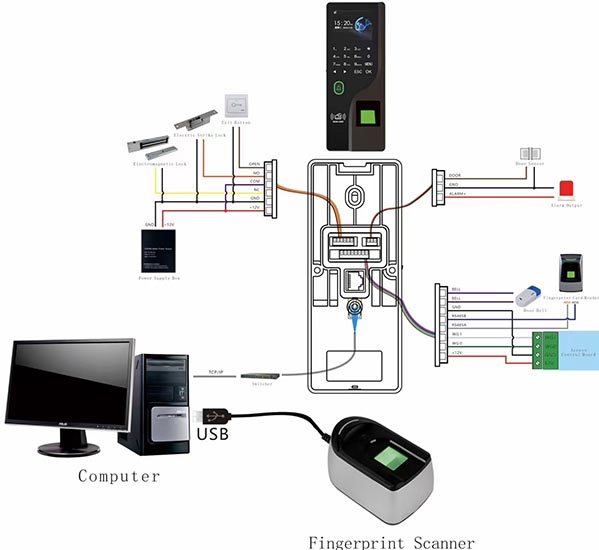
Use the fingerprint reader to collect the user's fingerprint information and card information, and send it to all access control and fingerprint machines in use through the client software, which is convenient for on-site fingerprint and card data collection. The fingerprint reader supports USB power supply and communication, built-in voice circuit, and unified algorithm with the fingerprint attendance machine to ensure the consistency of data and the convenience of operation. The diagram of the fingerprint sensor collection management system is as follows:
Taking the fingerprint attendance machine as an example, all online access control and fingerprint machines can be automatically searched and found through the software to automatically search for the device, which is convenient for the device to join the system software. Click [Automatically search for access control devices] in the [Install Device] drop-down menu on the main interface, as shown in the following figure:
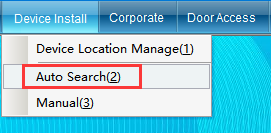
Click [Auto search access control device] to enter the interface as shown below:
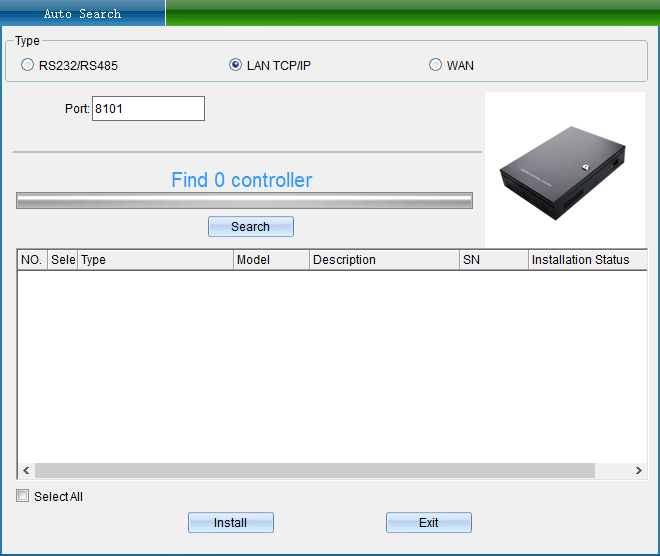
TCP/IP LAN mode: first enter the network port, the default is 8101, and then click [Start Search]. (Note: The device must communicate with the computer through the switch), as shown in the following figure:
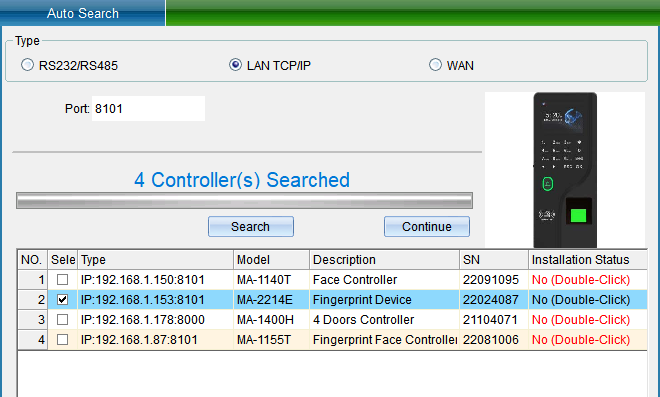
If your device is in TCP/IP communication mode, you need to modify the IP address of the device to avoid communication failure due to the same IP address. Then you can double-click the device information to pop up the TCP connection parameter interface:
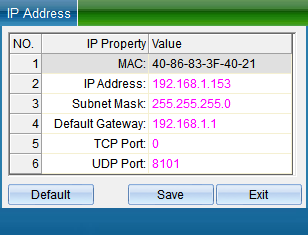
(Note: This system can search for fingerprint machines in different network segments from this computer, but before normal use, you need to modify the IP address of the fingerprint machine to the same network segment address as the computer. And if the router you use supports multi-network segment mapping function, then the system software can directly communicate with the fingerprint machine products in other network segments).
Double-click the IP address, subnet mask, and gateway address to change the parameters that match the same network segment of the computer IP, click [Save] to return to the installation interface, and then click the [Install Device] button to install, and click the left side after installing the device. Column [Access Control Management] Select the device and click the [Properties] column, the following figure will pop up:
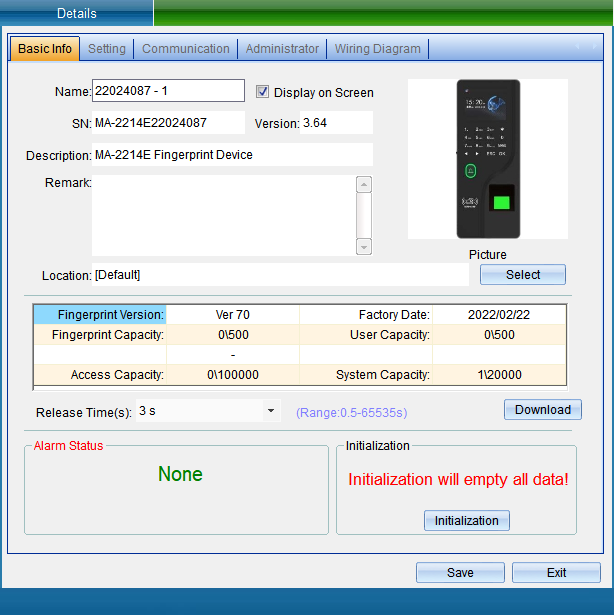
Name: Can be modified as required.
Unlock hold time: It can be adjusted according to your needs (default: 3 seconds).
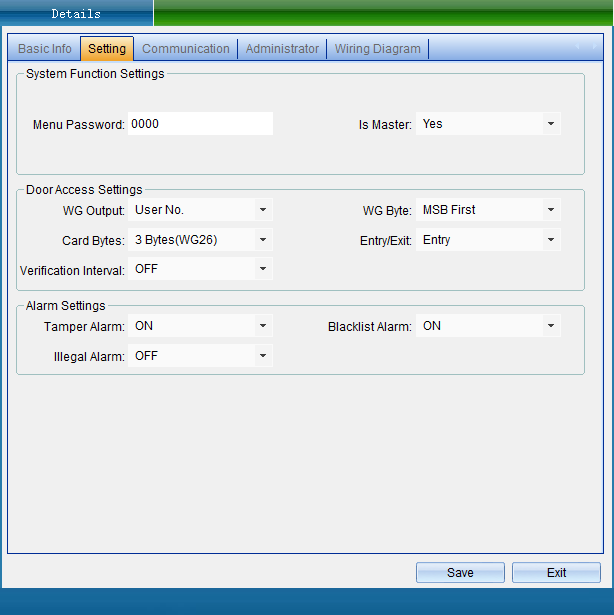
Select [Function Settings] in the [Device Details] interface to modify the menu management password, access type, card number byte, WG output type, access type, master and slave settings of the fingerprint machine.
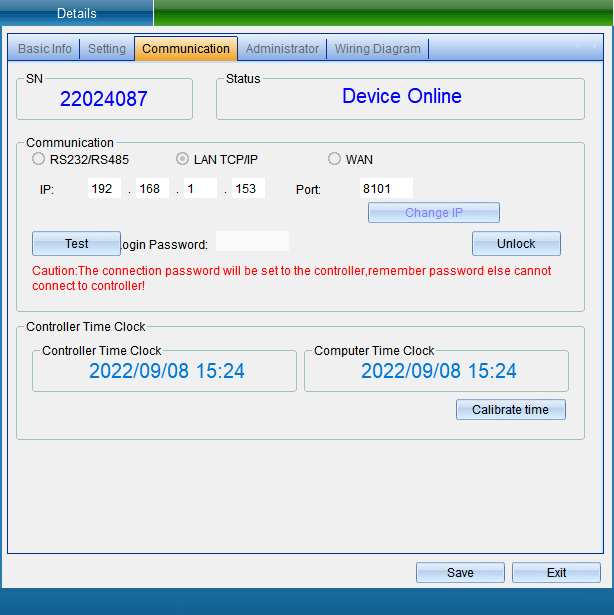
Select [Communication Settings] in the [Device Details] interface.
Add fingerprint and authorize
In [Enterprise Information] -> [Personnel File], as shown below:
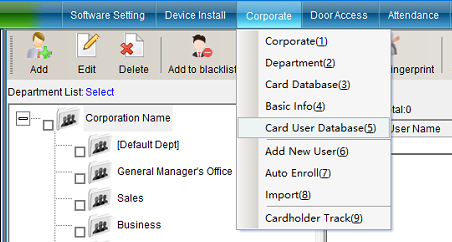
Click on the personnel file to enter as shown below:

Click the Add Person icon to enter the personnel modification interface, as shown in the following figure:
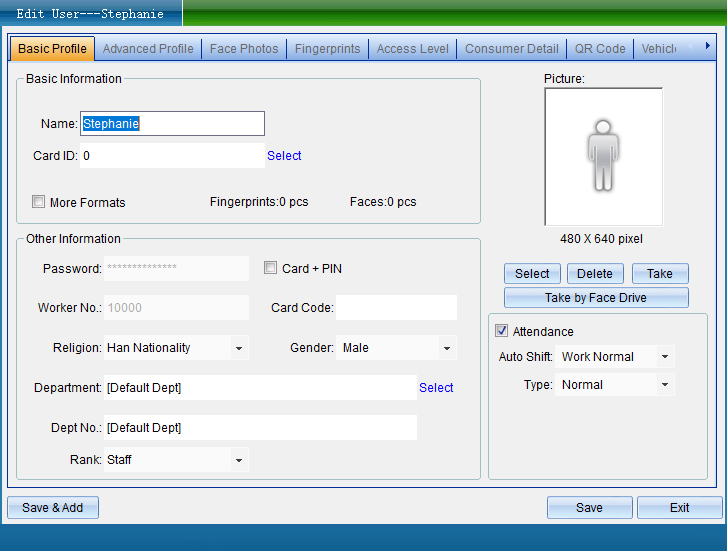
After filling in the basic personal information, click the sub-category [Fingerprint Management], as shown below:
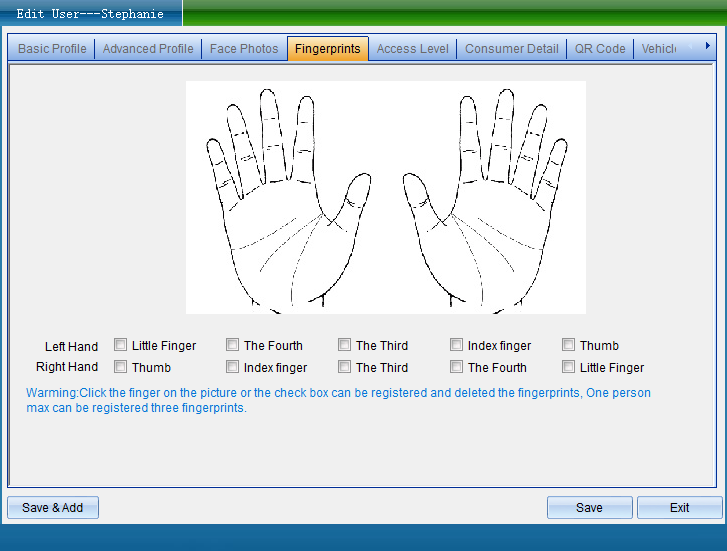
After entering the fingerprint, you will return to the basic personnel file page, confirm the edited information and click Save.
To authorize the door opening authority, click [Set Door Open Authorization] in the [Access Control Information] drop-down menu of the software. Click [Set Open Door Authorization] to enter the interface as shown below:
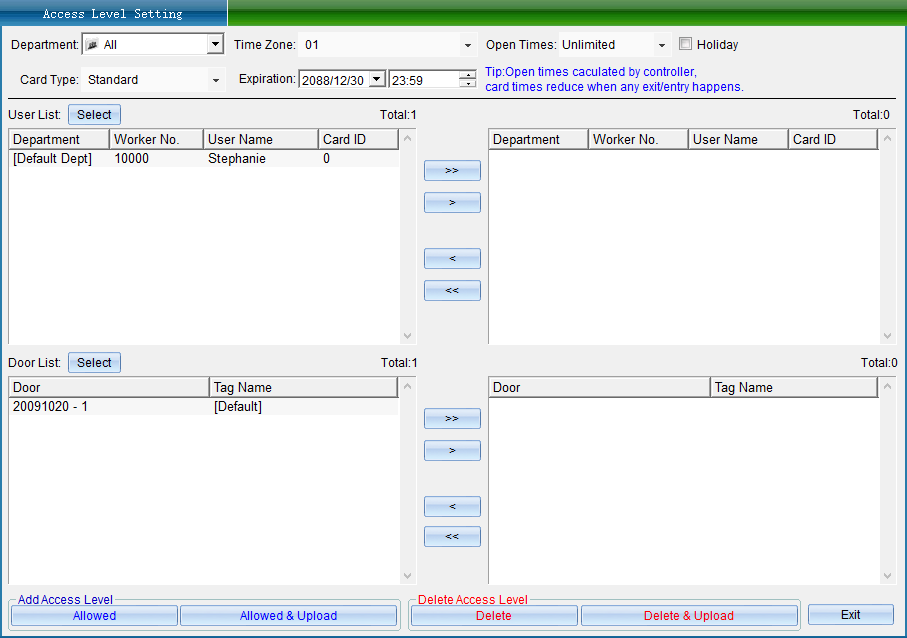
Select the person who needs to set the authority, the opening time period and the number of opening times, and the validity period, then select the equipment door, and click [Allow the selected person to pass through the selected door and upload].
» : Select all "Users" or select all "Optional Doors".
› : Select a single "User" or select a single "Optional Door".
‹ : remove a single "selected user" or remove a single "selected door".
« : remove all "selected users" or remove all "selected doors".
The button [Forbid the selected person to pass through the selected door] is used to delete the entry and exit permission of the selected user to the selected door. After that, the data must be synchronized to the fingerprint machine, and the deleted permission will take effect.
The button [Forbid the selected person to pass through the selected door and upload] is used to delete the access authority of the selected user to the selected door, and upload the deletion information to the fingerprint machine at the same time.
The button [Allow the selected person to pass through the selected door] is used to add the access permission of the selected user to the selected door. After that, the data must be synchronized to the fingerprint machine before the added permission can take effect.
The button [Allow selected person to pass through the selected door and upload] is used to add the access authority of the selected user to the selected door, and upload the added information to the fingerprint machine at the same time. After all permissions are set, uploading the information to the fingerprint machine will take effect.
Fingerprint machine record collection and viewing
Fingerprint machine record collection
The fingerprint machine has a memory storage function, and each fingerprint machine can store and record the incoming and outgoing data offline (even if the computer is not turned on, it will be automatically stored). You can also choose a suitable time to collect the data in the fingerprint machine to the computer.
Click the [Access Control Information] drop-down menu [collect access records] of the software, as shown in the following figure:
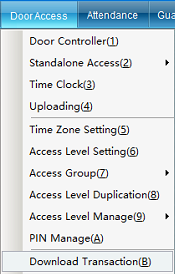
Click [collect entry and exit records] to enter the interface as shown below:
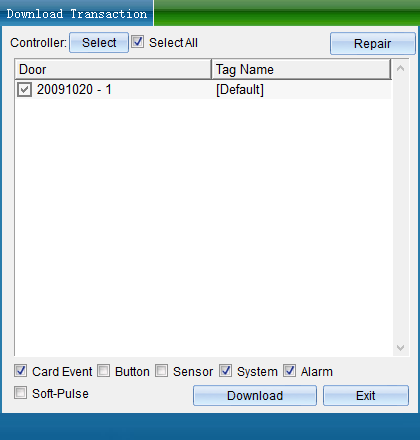
After selecting the fingerprint machine and record type to be collected, click [collect selected device records], and the window as shown below will pop up:
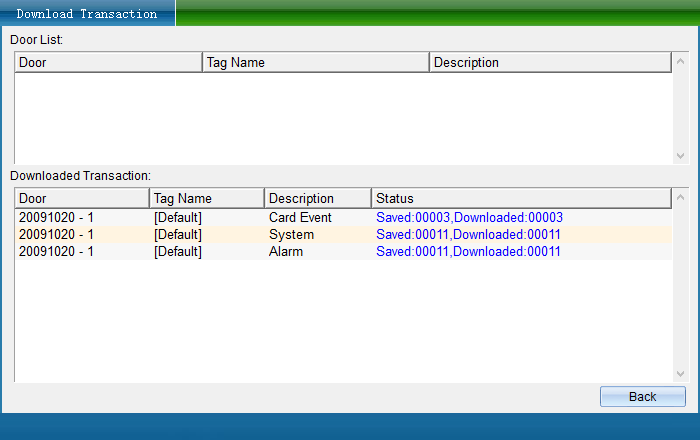
When the collection is complete, click [Finish].
If you have collected access records (card reading records, password opening records, fingerprint records) and other operations before, you can retrieve all records through "Repair Records".
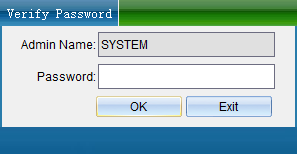
Click [Repair Records] in the [Access Control Information] drop-down menu of the software [Access and Exit Records] interface, and a verification window will pop up, enter the verification password: 0000 (default administrator password), and then click [OK], as shown in the following figure:
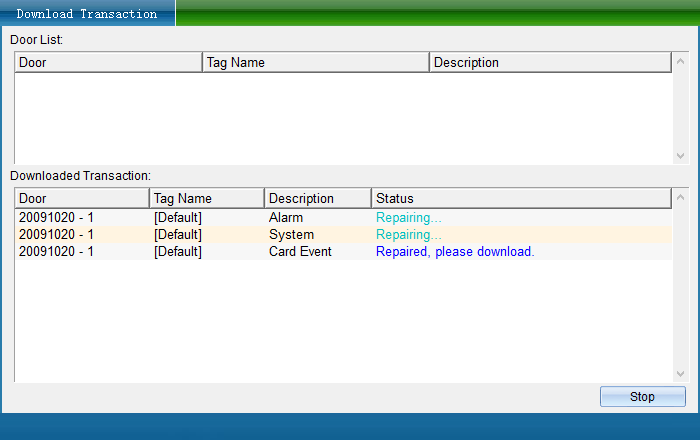
After the repair is completed, click [Finish] to return to the collection access control record interface, select the door to extract the card reading record and the data to be collected, and then click "collect the selected device record", wait for a while and the collection will be completed. The records are all collected to the computer, as shown in the following figure:
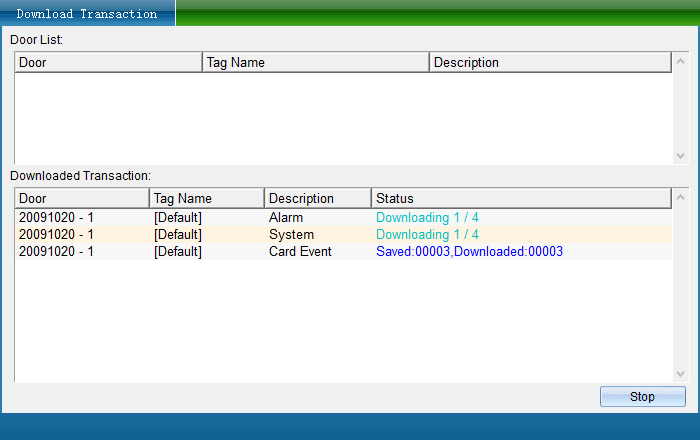
When the collection is complete, click [Finish]. After the records are collected, the query work can be carried out.
Fingerprint machine record view
Please collect the records before inquiring.
Click the [Access Control Information] drop-down menu [View Access Record] in the software menu bar, as shown in the following figure:
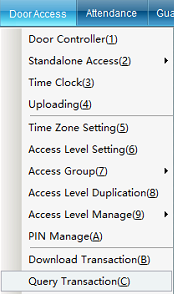
Click [View entry and exit records] to enter the interface as shown below:
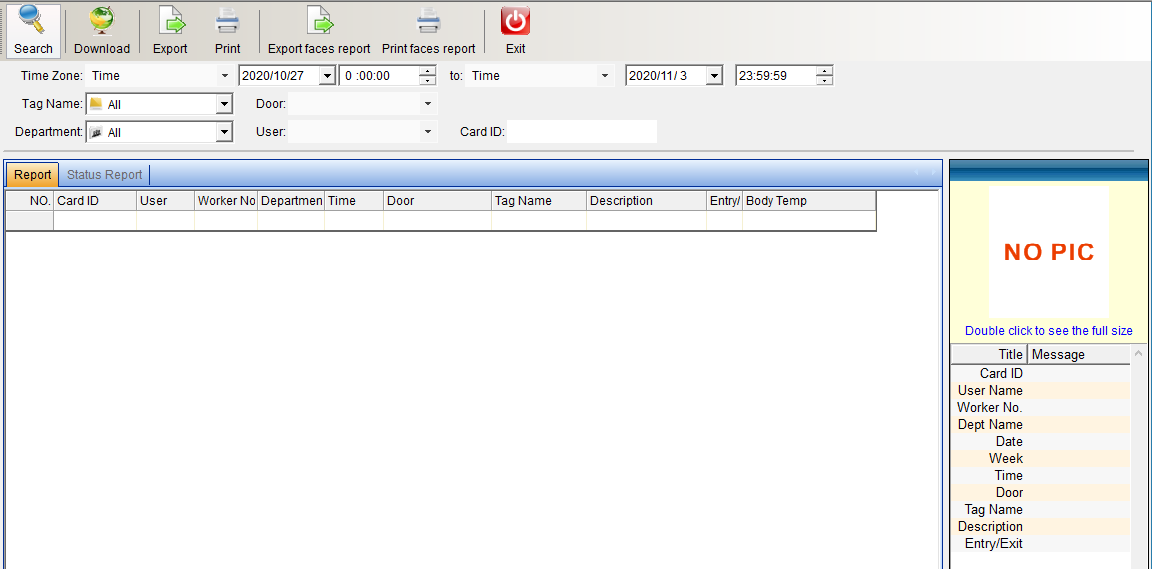
First collect records, click "collect records", after collecting records, you can query as needed, enter query conditions, query conditions can be carried out by "time range", "name", "card number", "department", "location" Query related records, and then click "Search", you can query the entry and exit records of relevant personnel, or you can directly click "Search" to query the entry and exit status of everyone, as shown in the following figure:
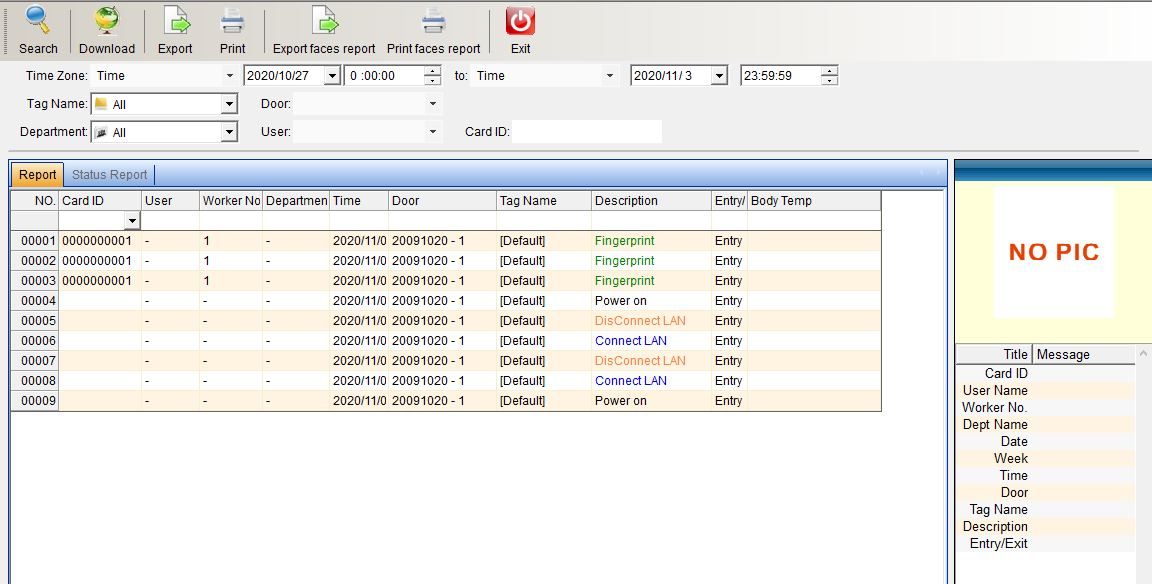
You can also export the queried records, and click "Export" to export the personnel entry and exit records.
Instructions for using the cloud system
Install the fingerprint machine
First set the communication parameters of the fingerprint machine, select [System Parameters] under the main menu of the fingerprint machine device, click to enter, and then select [Communication Settings], set the parameters such as the server IP address and server port number, and the reference settings are shown in the following figure:
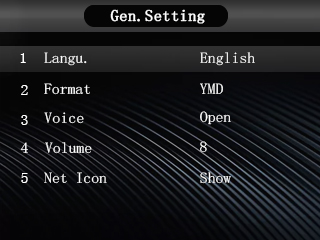
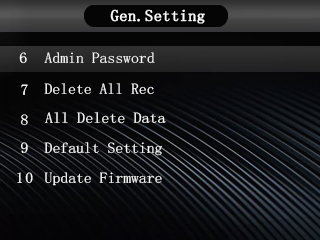
After configuring the parameters, click to select "Server Connection Test", and it will prompt "Test Success", indicating that the connection is normal (if the network is not good, you can try "Server Connection Test" several times). Record the cloud platform account of the one-card management platform, as shown in the following figure:
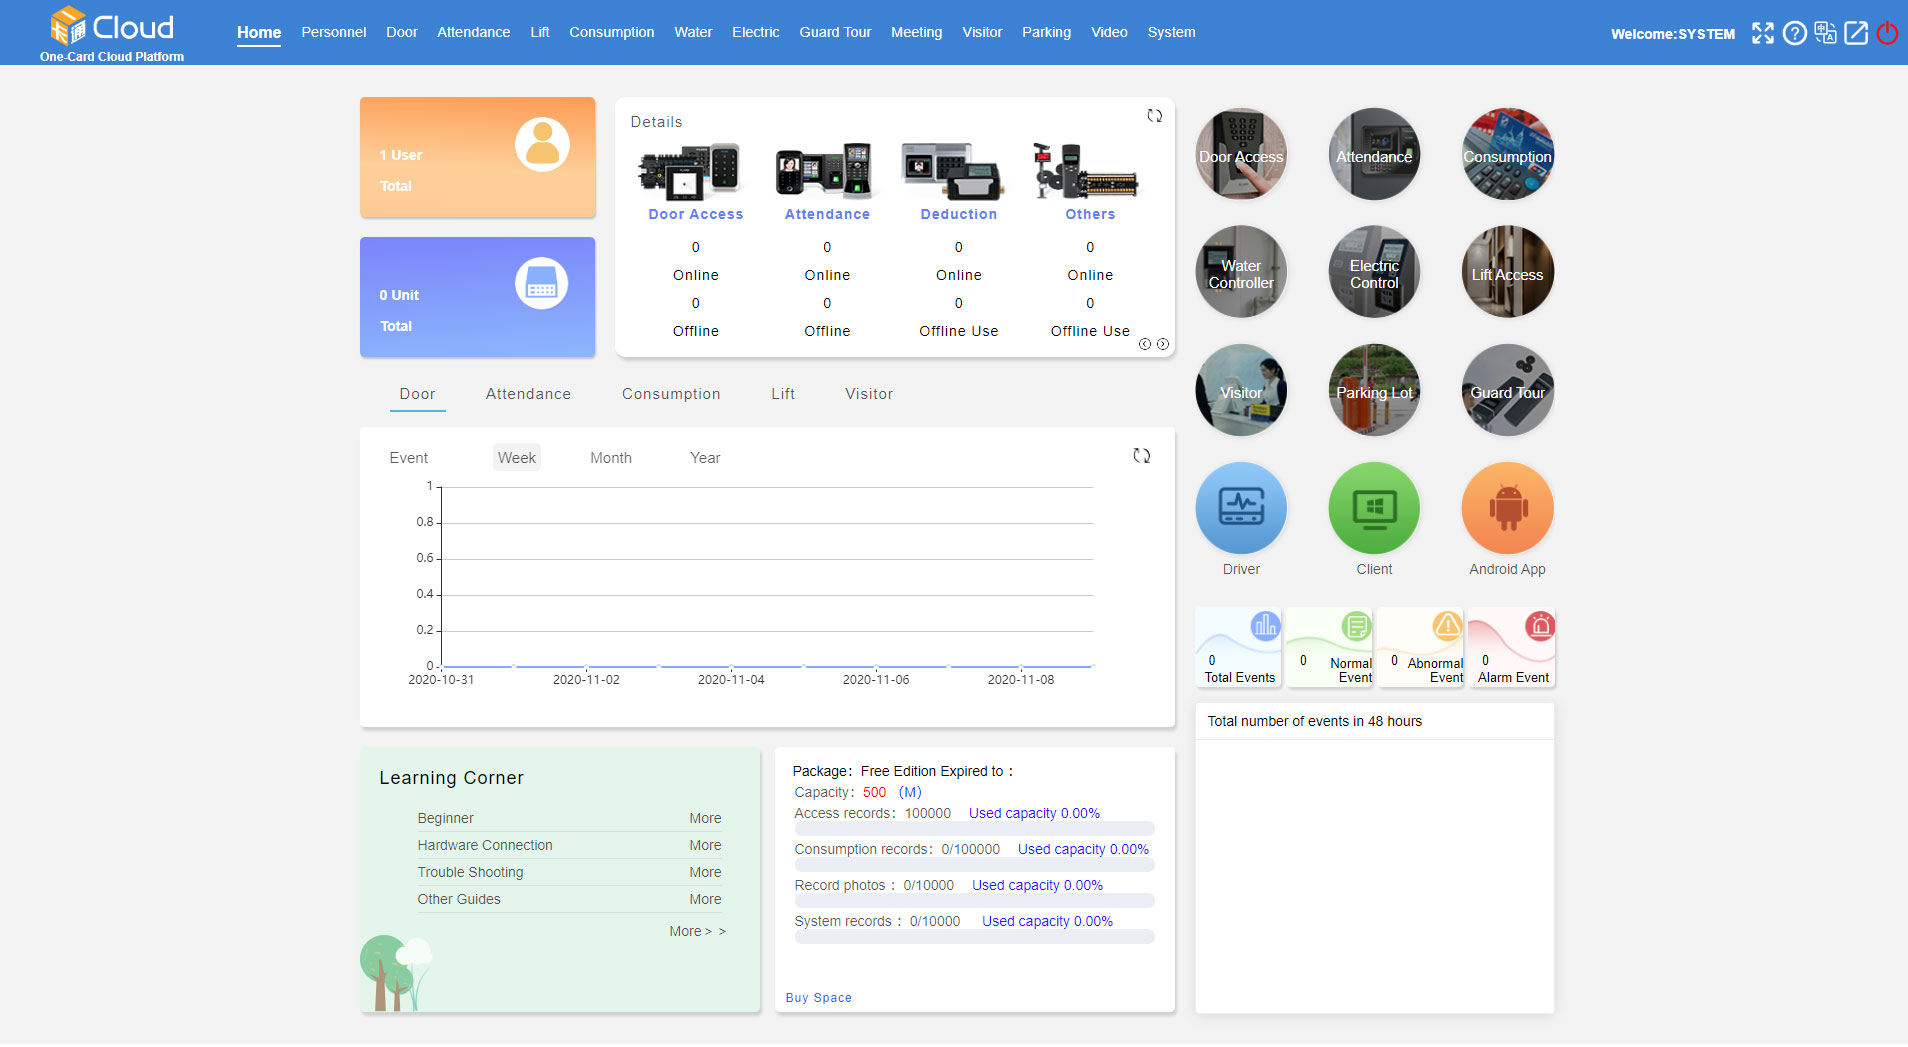
Click [Access Control] - [Install], enter the SN code of the device to be installed in the pop-up interface, and click OK, as shown below:
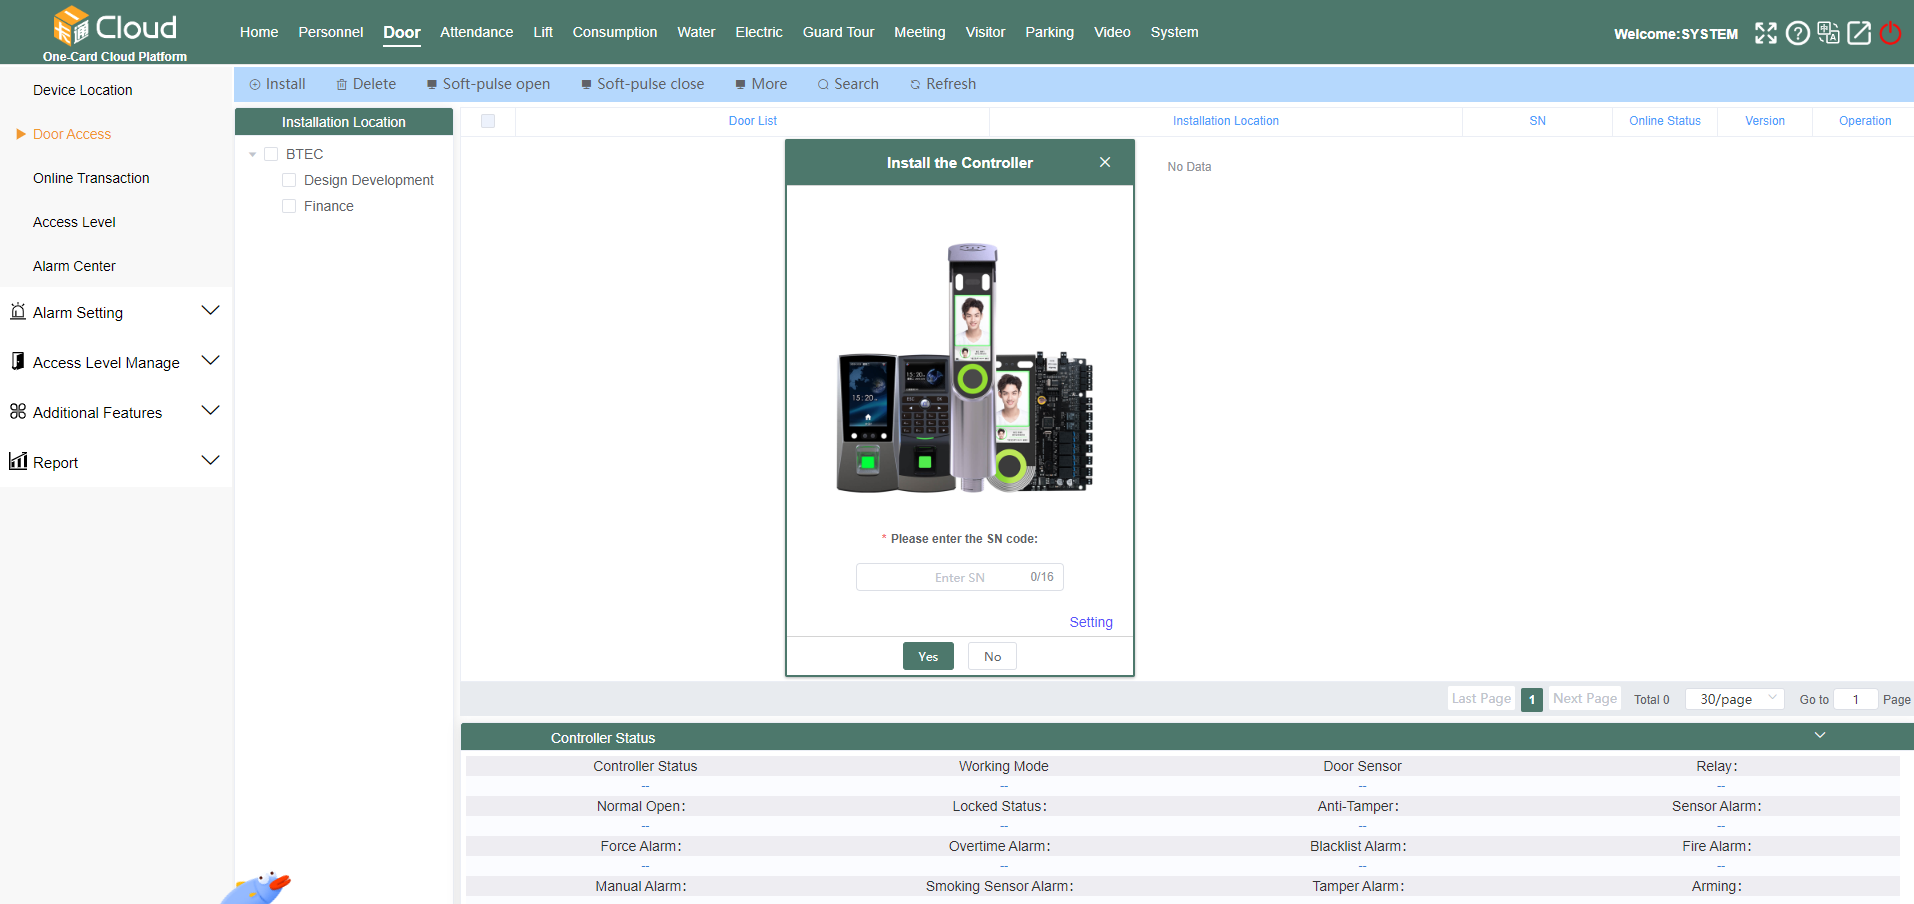
In the pop-up installation interface, the installation interface is as shown in the figure below, select the location to be installed, select the basic parameters of the device, and then click the [Install] button in the lower right corner, and the device will be prompted to install successfully.
Personnel Addition and Authorization
Addition of people
Click [Personnel] - [Add], the pop-up [Add Personnel Profile] interface, enter the personnel information to be added - click OK, as shown below:
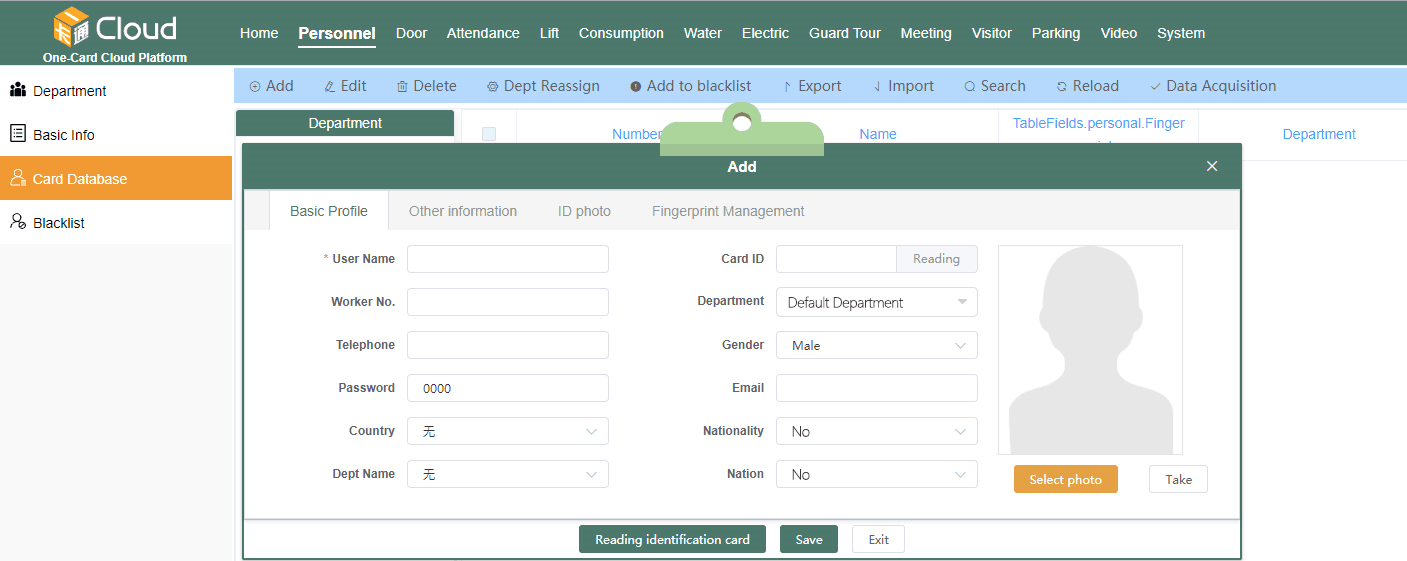
fingerprint entry
On the [Add Personnel File] interface, click Fingerprint Management, the fingerprint adding interface is as shown in the figure (the computer needs to be connected to the fingerprint collector), click the finger to register/delete the fingerprint, click the check box to also register/delete the fingerprint, a person A maximum of 3 fingerprints can be entered, click [Confirm] after entering.
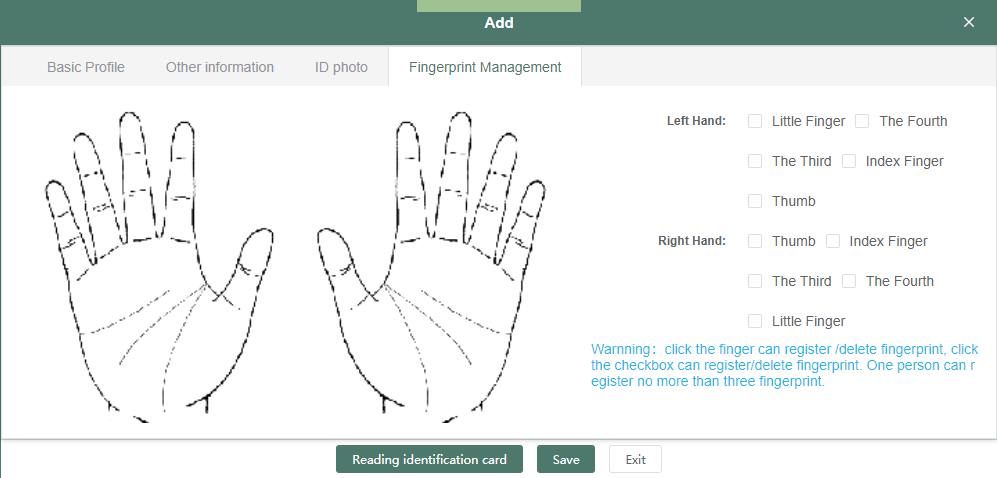
Personnel fingerprint entry can also be entered through the fingerprint machine and then collected into the software, click [Personnel] - [Personnel Information] - [Data Retrieved from Device] - [Collect Data] in the directory bar, select the fingerprint machine, and click [Data] Collection] as shown below:
Personnel authorization
Click [Access Control] - [Permission Authorization]
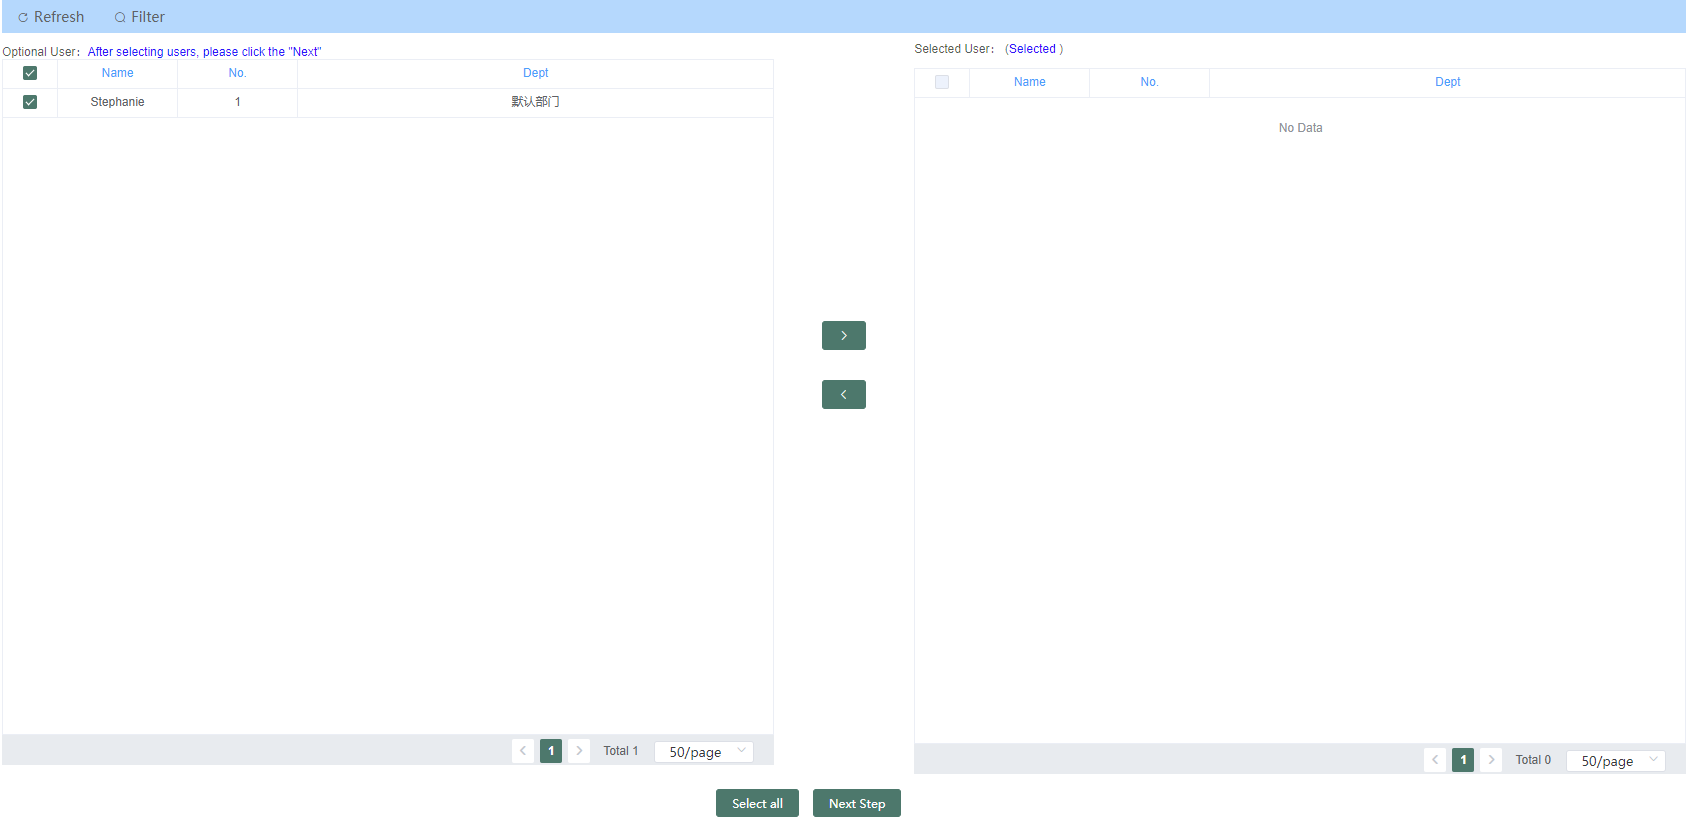
Select the person who needs to set the access control permission. After selecting, click Next, as shown in the following figure:
【>】:Select "User"
[<]: Remove the "selected user"

Select parameters such as opening time period, opening times, validity period, door name, and installation location according to actual needs, and select the door for authorization, as shown in the following figure:
【Prohibit selected personnel from passing through the selected door】Delete the access authority of the specified user to the selected door
[Allow selected people to pass through the selected door] Add the access authority of the specified user to the selected door
Record view
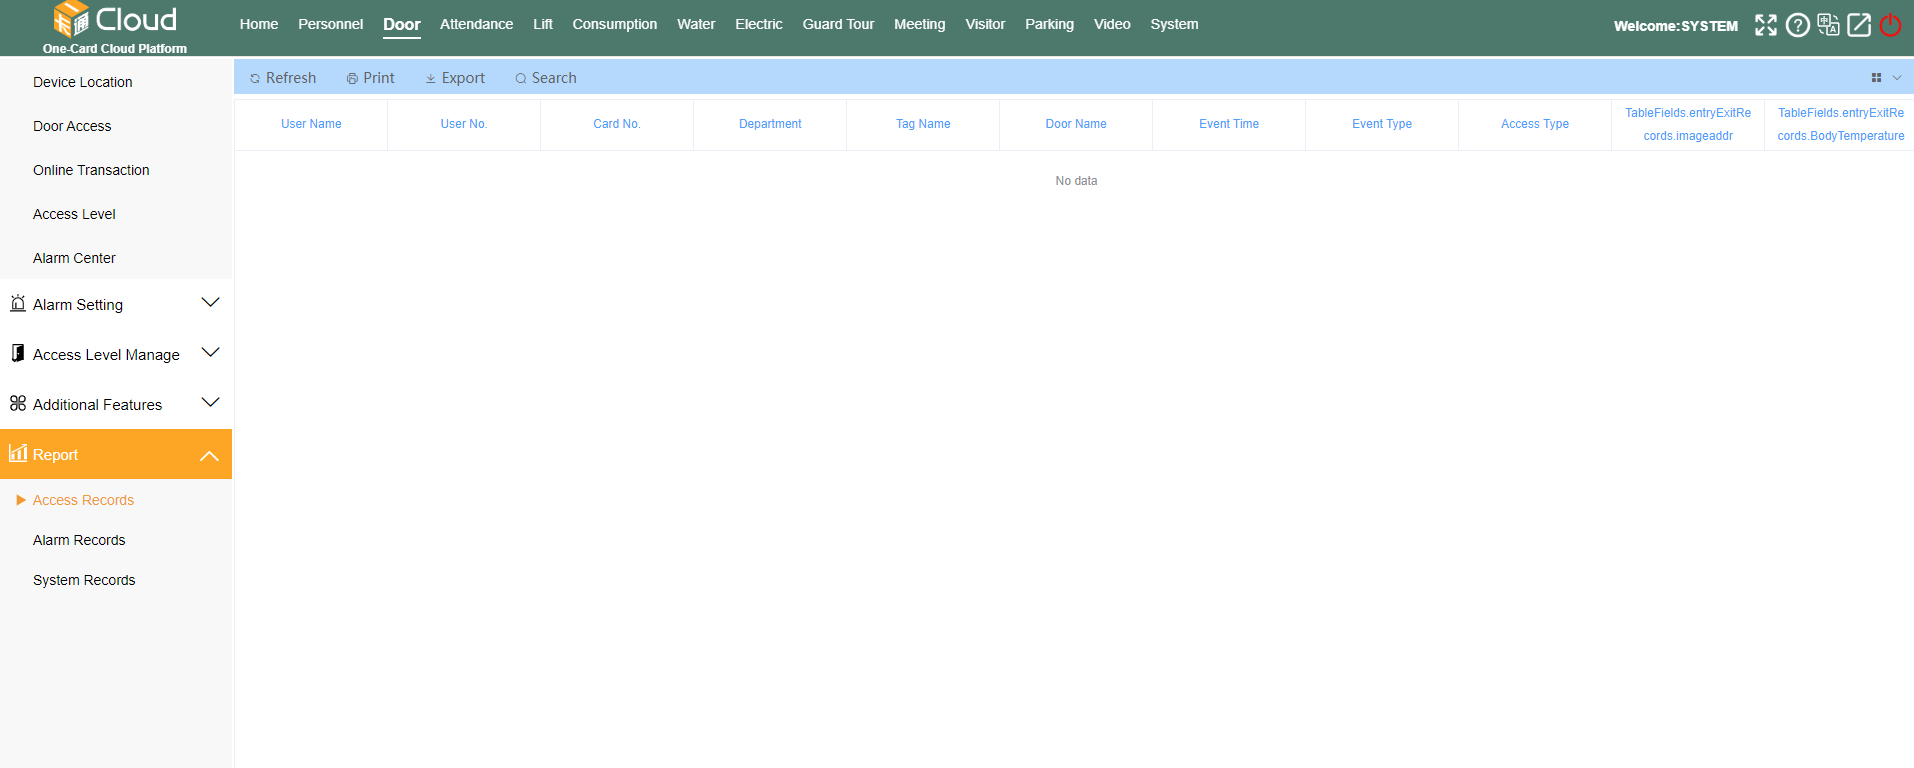
Click [Access Control] - [Access Control Report], and select the records to be viewed or exported, including access control access records, access control alarm records, and access control system records.
Click the search button to filter the records of the fingerprint machine to be viewed as required, as shown in the figure below: Click the export button to the left of the search button to export the EXCEL table of the required records.
